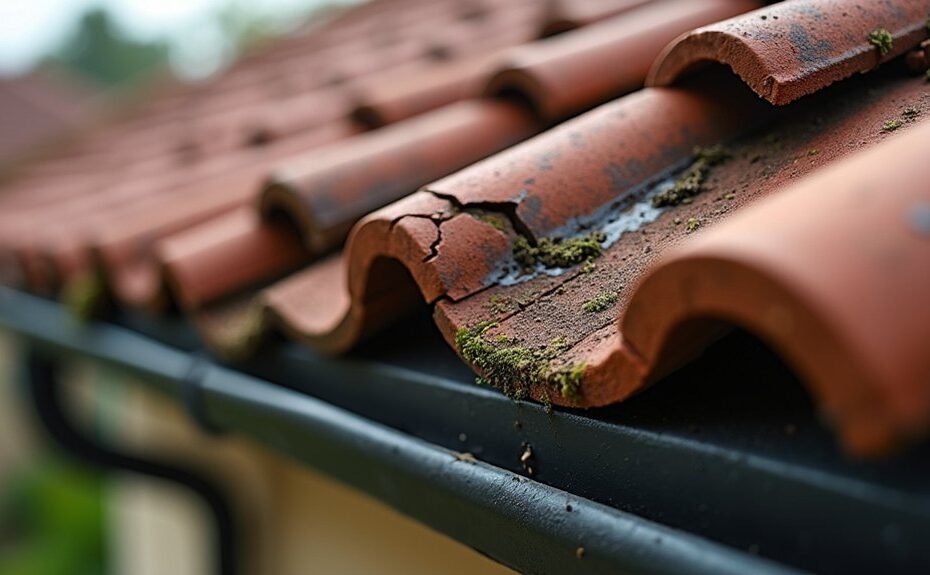
You can prevent most roof failures if you spot loose tiles and early leaks before they spread. Start from the ground with binoculars and check for lifted edges, slipped courses, cracked corners, and misaligned ridges, then scan gutters for granules and debris. Inside, watch for ceiling stains, paint bubbles, musty odours, and damp insulation near vents or chimneys. Don’t climb without a stable ladder and PPE—your next check is where problems hide.
Key Takeaways
- Inspect from the ground with binoculars for missing, lifted, misaligned, or cracked tiles and gaps along ridges, hips, and verges.
- Check flashing at chimneys, vents, skylights, and roof-to-wall joints for lifting, rust, missing fasteners, or cracked sealant.
- Look for drainage warnings: sagging gutters, separated joints, overflow stains, and debris in valleys that can force water under tiles.
- Indoors, watch for ceiling stains, bubbling paint, soft drywall, musty odours, or damp attic insulation near penetrations and rafters.
- After storms, photograph damage and arrange prompt repairs; avoid climbing on wet roofs or any roof showing sagging or damaged decking.
Roof Maintenance Basics: Safety, Tools and Timing

Before you step onto a roof, treat the job like a controlled work site: plan the timing, stage the right tools, and set up fall protection. Schedule work in dry, low-wind conditions and avoid midday heat that softens asphalt.
Use safety precautions: wear slip-resistant boots, gloves, and eye protection, and tie off to a rated anchor with a harness and lanyard. Set a stable ladder with proper angle and standoff.
For tool selection, bring a headlamp, chalk, tape measure, utility knife, sealant, fasteners, and a magnetic pickup for debris. Keep tools in a belt to maintain three points of contact.
Stop immediately if you see damaged decking, sagging, or electrical hazards nearby.
Roof Maintenance From the Ground: Tiles, Ridges and Gutters
Once your safety plan and tools are set, start with a ground-level inspection that keeps you off the roof while still catching common failure points. Walk the perimeter with binoculars and look for uneven rooflines, gaps at ridges, and missing or lifted ridge caps. Check flashing lines you can see from below—chimneys, valleys, and abutments—for rust staining or displaced edges. Note tile profile and color so Roof tile replacement matches if you later order materials.
Next, assess drainage. During dry weather, inspect gutters for sagging, separated joints, and overflowing stains on fascia. Plan gutter cleaning using a stabilized ladder, standoff, and spotter; clear debris, then flush downpipes to confirm flow. Finish by checking ground splash zones for erosion indicating chronic overflow.
Roof Maintenance: Spotting Loose, Slipped or Cracked Tiles
Wind uplift, freeze–thaw cycling, impact from debris, and failed fixings commonly loosen, slip, or crack roof tiles, so you need to spot early movement before leaks start.
You’ll stay safer by inspecting from the ground with binoculars, checking courses for misalignment, looking for lifted edges, fresh chips, and gaps at ridges and verges, and keeping well clear of overhead power lines.
If you see displacement, fractured tiles, or sagging areas, you should keep off the roof and arrange a qualified repair to prevent further damage.
Common Causes Of Tile Damage
Why do roof tiles fail even when they look intact from the ground? You’re often seeing early tile deterioration hidden at laps, nail holes, and edges where stress concentrates.
Weather impact drives most damage: freeze–thaw cycles expand microcracks; hail bruises clay and concrete; UV and heat cycling dry and warp tiles and underlay. Wind uplift can lift a corner, breaking nibs or dislodging fixings, then the next gust worsens it.
Salt-laden air and pollution accelerate surface erosion and weaken coatings. Foot traffic, ladder loads, and dropped tools crack tiles and compromise bedding mortar.
Poor installation—wrong gauge, inadequate clips, or mismatched tile profiles—creates point loading and movement. Finally, blocked valleys and gutters force backflow, saturating battens and triggering slip.
Safe Visual Inspection Steps
Before you get close to the roofline, run a ground-level visual check that keeps you out of fall zones while still revealing early movement. Use binoculars to scan tile courses for shadow gaps, lifted leading edges, and misaligned hips and ridges. Track lines along mortar beds and look for cracked corners, chipped noses, or missing nibs.
Next, work from a stable ladder only if you’ve set it on firm ground, tied it off, and kept three points of contact for roof safety. Don’t step onto tiles.
Use inspection tools like a torch to highlight hairline fractures, a camera zoom for documentation, and a moisture meter inside the loft to correlate stains with suspect slopes. Mark findings, then schedule repairs promptly.
Roof Leak Signs Indoors: Stains, Smells and Paint Bubbles
Although a roof leak often starts small, you can usually spot it indoors long before you see water dripping. Start with indoor moisture checks: run a hygrometer in suspect rooms and note persistent readings above typical levels for your home.
For stain detection, scan ceilings and upper walls for yellow-brown rings, shadowing, or softened drywall, especially after wind-driven rain. Don’t ignore musty odours; they often signal concealed wetting and potential mould growth.
Check paint and plaster for bubbling, peeling, or hairline cracking—pressure from trapped water can lift coatings. Probe gently with a plastic putty knife; if the surface flexes or powders, mark the area and keep people clear.
If you see active seepage near electrics, shut off power and call a professional.
In the Loft: Damp, Daylight and Wet Insulation Checks
In the loft, you’ll use a torch and careful footing to track damp patches on rafters, timbers, and the underside of the roof deck.
You’ll also scan for pinpricks or stripes of daylight that signal gaps around tiles, flashing, or penetrations.
Finally, you’ll lift insulation in small sections and check for wet, compressed, or mouldy areas so you can isolate the leak path before it spreads.
Tracking Damp Patches
Where do those ceiling stains really start? You’ll often find the answer in the loft, so suit up: gloves, mask, and stable footing on joists only. Begin damp patch identification by tracing discoloration on rafters, felt, and timbers back upslope toward the ridge, looking for tide marks and darkened nail heads.
Use moisture detection methods: a pin-type meter on rafters and a flashlight to spot sheen on underlay. Check insulation by lifting it in small sections; wet or compressed areas show the leak’s path, but don’t disturb wiring or recessed lights.
Mark suspect zones with tape, photograph them, and recheck after rain to confirm active ingress. If timber feels soft, stop and call a roofer urgently.
Spotting Daylight Gaps
How can a roof leak stay hidden even when the loft looks dry? You’ll often spot it first as daylight where none should be.
Enter the loft with a torch, wear a mask and gloves, and step only on joists or a secured crawl board.
At dawn light, switch off your torch and scan the underside of the roof covering. Pinprick stars, thin lines along laps, or bright wedges at the eaves indicate displaced tiles, cracked underfelt, or open mortar joints.
Use your hand to feel for cold drafts around those points, then mark locations with chalk for external inspection.
Watch the shadow play as clouds pass; changing contrast helps reveal hairline gaps you’d miss under steady lighting. Don’t disturb wiring or vents.
Checking Insulation Moisture
Quickly tell if a leak’s still active by checking your insulation for dampness and compression. Wear gloves, a P2 mask, and eye protection before you enter the loft; wet fibres can irritate lungs and skin.
Press a clean paper towel onto suspect areas and note any fresh staining. Lift insulation carefully and inspect the underside for dark patches, musty odour, or icy crust in winter—signs of moisture accumulation.
Check rafters and joists for wet sheen, mould, or softened timber. If insulation feels heavy, clumps, or stays flattened, you’re seeing insulation degradation and reduced R-value.
Bag and replace saturated sections, then trace upward to the roof deck to pinpoint the entry point. Ventilate and dry the space safely.
Flashing and Chimneys: The Most Common Roof Leak Points
Even if your shingles are in good shape, failed flashing around chimneys, vents, and roof-to-wall joints can still let water in fast. From a ladder, look for lifted edges, missing fasteners, rust streaks, cracked sealant, and gaps where metal should sit tight to the surface. Inside, check the attic sheathing near these penetrations for dark staining or damp insulation.
Don’t step onto steep or wet roofs; use fall protection and keep three points of contact. For small issues, you can schedule flashing repairs such as replacing deteriorated sealant with compatible roof-grade sealant and re-securing loose step flashing.
Chimney flashing needs special attention: inspect counterflashing embedded in mortar joints and the cricket for debris buildup. If metal is corroded or separated, plan a professional replacement.
Roof Maintenance After Storms: What to Check and When to Call a Roofer
After a storm moves through, you should inspect your roof as soon as conditions are safe, because wind, hail, and heavy rain can turn minor wear into an active leak.
From the ground, scan for missing or lifted tiles, dented metal, exposed underlayment, and debris at valleys and gutters. Check flashing at chimneys, vents, and skylights for bends or gaps.
Inside, look for new stains, damp insulation, or musty odors.
Don’t climb onto wet or steep roofs; use binoculars and keep ladders off power lines.
Call a roofer if you see widespread tile loss, punctures, sagging decking, or persistent leaks.
For storm preparedness, document damage with photos and start roof inspection scheduling within 24–72 hours.
Frequently Asked Questions
How Often Should a Roof Be Professionally Inspected in the UK?
In the UK, you should book a professional roof inspection annually, and after severe storms. You’ll reduce safety risks by following a maintenance checklist, documenting defects, and scheduling prompt repairs before water ingress damages timbers.
Will My Home Insurance Cover Repairs for Loose Tiles or Leaks?
Like a safety net catching a fall, your home insurance might cover loose-tile or leak repairs if sudden and accidental; for Insurance claims, document promptly. Check Coverage exclusions: wear, poor maintenance, stormproofing neglect often void cover.
What Is the Typical Cost Range for Minor Roof Repairs?
You’ll typically pay $150–$800 for minor roof repairs, depending on Roof material and access. You should get written estimates, confirm Repair warranties, and avoid DIY work on steep pitches; fall protection’s mandatory.
How Long Do Common Roof Materials Last Before Needing Replacement?
You can expect roofing material lifespan of 15–30 years for asphalt, 40–70 for metal, and 50–100+ for slate/clay; roof tile durability varies. For example, you’d replace 20-year shingles after recurring leaks and deck rot.
Do I Need Planning Permission to Replace Tiles or Change Roof Materials?
You usually don’t need planning permission to replace like-for-like tiles, but changing materials may. Check local permit requirements, conservation rules, and building regulations. Use certified installers, guarantee fire ratings, loading, and safe access.