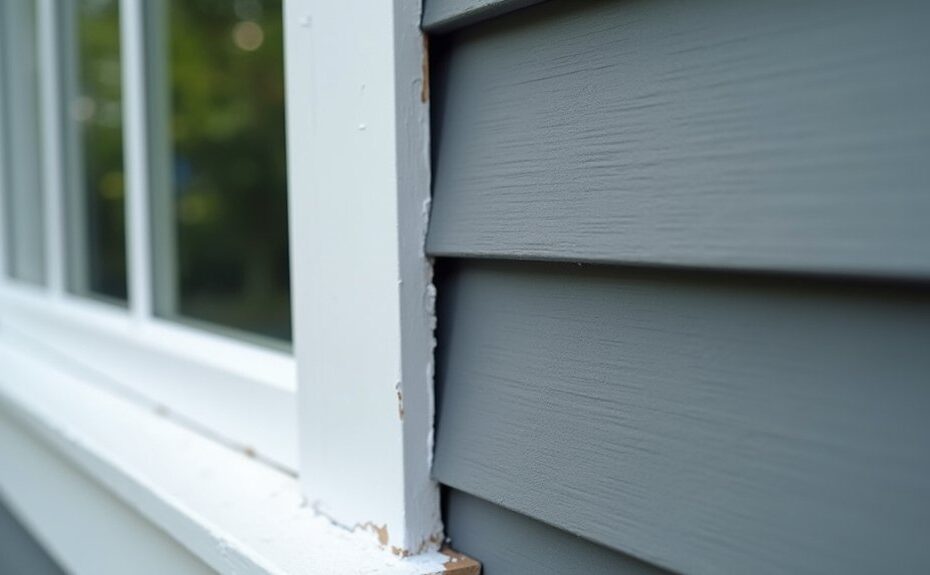
If you’re repainting the sun-baked window frames on a 1980s split-level, you’ll see why prep dictates the final look. You schedule the job for dry, mild weather, then choose a modern satin or semi-gloss exterior trim paint that levels well. You clean, scrape, sand, and repair rot or gaps before you mask glass and siding for tight lines. The key is how you prime and lay on two coats without lap marks—and that’s where most projects go sideways…
Key Takeaways
- Plan a 4-day workflow and paint only in 50–85°F, dry, stable weather with no rain expected for 24–48 hours.
- Clean thoroughly, remove loose paint, treat mildew, sand smooth, and repair rot, cracks, and failed caulk before painting.
- Choose exterior-grade trim paint (100% acrylic or alkyd/hybrid) and a consistent satin or semi-gloss sheen for a crisp, modern finish.
- Mask precisely with tape and film, keeping lines straight; remove tape when paint tacks up for sharp edges.
- Spot-prime bare wood and patches, then apply two thin coats, lightly sanding between coats and maintaining a wet edge.
Plan the Repaint (Time, Weather, Safety Checks)
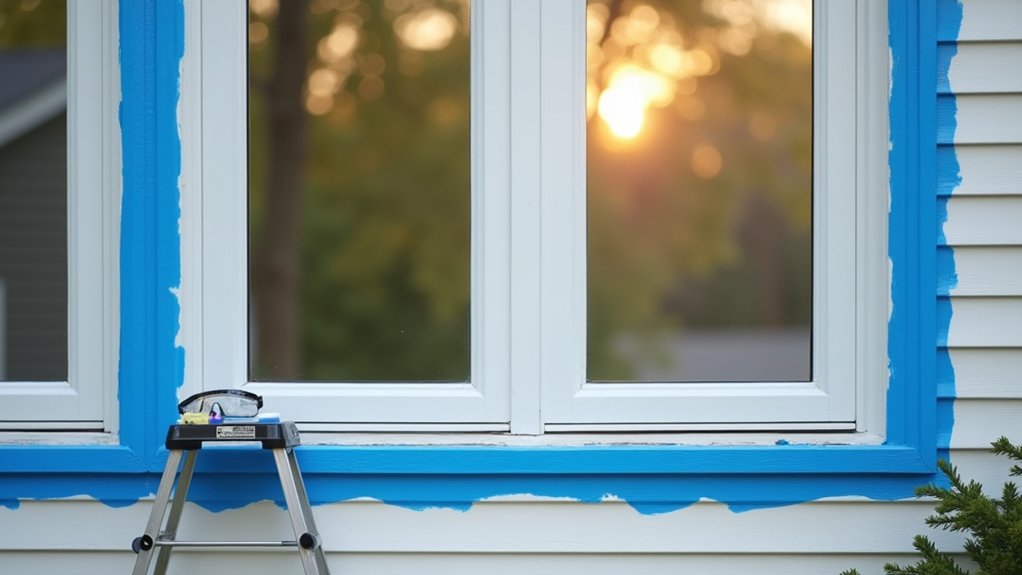
Before you open a paint can, lock in the schedule, weather window, and safety setup so the coating actually cures and you don’t create avoidable hazards.
Build a Scheduling timeline: day 1 inspection and masking; day 2 surface prep and dry-out; day 3 prime and first coat; day 4 second coat and cure buffer.
Verify your weather considerations with hourly forecasts: aim for 50–85°F, stable conditions, and no rain for 24–48 hours after each coat.
Avoid painting in direct midday sun or when dew points predict overnight condensation.
Stage ladders on firm, level ground; tie off or use stabilizers, and keep three-point contact.
Wear eye protection, gloves, and a respirator for sanding dust and fumes.
Keep pets and kids clear.
Choose Exterior Trim Paint and Sheen
Choose an exterior trim paint rated for weather exposure, such as 100% acrylic latex for broad durability or alkyd/hybrid enamel when you need a harder film.
Pick a sheen that suits trim—typically satin or semi-gloss—so it sheds water and dirt while still leveling cleanly on narrow profiles.
Prioritize formulas with strong color retention and UV inhibitors so the finish resists fading and chalking on sun-facing frames.
Weather-Resistant Paint Types
Because exterior window frames take the brunt of UV exposure, temperature swings, and wind-driven rain, you’ll get the most durable results by using an exterior trim paint formulated for high adhesion and moisture resistance, then pairing it with the right sheen for the surface and exposure level.
For wood, choose 100% acrylic exterior trim paint; it flexes with seasonal movement and resists peeling.
For previously oil-painted trim, use a bonding acrylic or urethane-modified acrylic to lock down edges and improve paint durability.
For metal frames, specify a direct-to-metal (DTM) acrylic or alkyd enamel with rust-inhibitive pigments, or apply a compatible metal primer first.
In coastal or high-humidity zones, prioritize mildew-resistant additives and fast-drying resins.
Maintain color coordination by selecting UV-stable colorants to limit fading and chalking.
Ideal Sheen For Trim
Although the same exterior trim paint can cover multiple substrates, you’ll get a longer-lasting finish on window frames by matching sheen to exposure, surface texture, and how much defect-hiding you need.
For most windows, choose satin: it sheds water well, cleans easily, and balances highlight and concealment for minor grain or tool marks.
Use semi-gloss on smooth, well-prepped metal or factory-smooth wood where you want maximum washability and higher finish durability, but only after you’ve filled and sanded defects, because it telegraphs flaws.
Pick low-luster/eggshell on rough-sawn trim or older frames with shallow checking when you need better hiding and less glare.
Keep sheen consistent across casings and sashes to avoid patchy reflections.
Test sheen options on a primed sample first.
Color Retention And UV Protection
Sheen affects how your trim reads in sunlight, but UV exposure determines how long the color stays true on exterior window frames. To maximize color retention, select a 100% acrylic exterior trim paint with built-in UV protection and a high-quality pigment package.
Avoid bargain paints that use low-grade colorants; they chalk and fade faster, especially on south- and west-facing elevations.
Confirm the label lists “UV resistant” or “fade resistant,” then match it to your sheen choice: satin or low-luster holds color well while hiding minor substrate defects.
Apply two uniform coats at the specified mil thickness; thin coats degrade sooner. Respect recoat windows and curing times so resins crosslink properly.
Finally, keep caulk joints tight to reduce moisture cycling that accelerates fading.
Tools and Materials to Repaint Window Frames
Before you crack open a can of paint, gather the right tools and materials so you can prep, repair, and coat exterior window frames without stopping mid-job. Choose a UV-rated exterior primer and topcoat matched to your substrate (wood, aluminum, or vinyl) and sheen goals for Decorative accents or Historical styles.
Buy paintable exterior caulk, two-part epoxy filler, glazing putty if needed, and a stain-blocking primer for tannin bleed. Use high-quality angled sash brushes, mini-rollers, and a paint pail with liner.
Keep a carbide scraper, sanding block, and assorted grits on hand for profiling, plus a putty knife, caulk gun, and utility knife. Add painter’s tape, drop cloths, nitrile gloves, respirator, safety glasses, and a moisture meter.
Clean, Scrape, and Sand Exterior Window Frames
You’ll start by removing dirt and grime with a mild detergent solution and a stiff nylon brush, then rinse and let the frame dry completely.
Next, you’ll scrape off loose or flaking paint with a sharp paint scraper, keeping the blade flat to avoid gouging the wood.
Finally, you’ll sand the surface smooth—feathering paint edges and scuffing glossy areas—so the new primer and topcoat can bond consistently.
Remove Dirt And Grime
A clean, stable surface makes every later step—priming, caulking, and repainting—bond correctly, so start by removing dirt, chalking, and loose paint from the exterior window frames.
Protect glass and siding with tape and a drop cloth, then mist the area to control dust.
For Dirt removal, wash with a mild detergent solution or TSP-substitute, working bottom-up to prevent streaking. Use a nylon brush to agitate profiles, corners, and glazing edges, and switch to a soft toothbrush for tight muntins.
Rinse thoroughly with clean water, top-down, so residue doesn’t redeposit.
If you see mildew, treat with an exterior mildewcide per label, then rinse again.
Let the frames dry fully before you proceed.
These Cleaning techniques reduce adhesion failures.
Scrape And Sand Smooth
Once the frames are dry, scrape and sand them to remove all loose paint, feather sharp edges, and leave a stable profile for primer. Use a carbide scraper to lift failing film down to sound paint or bare wood; keep the blade flat to avoid gouges. Vacuum chips and dust as you work so you can see defects and maintain clean surface preparation.
Switch to 80–120 grit to level gradations, then 150–180 grit to refine for paint application. Sand with the grain on wood, and scuff glossy areas on metal or PVC to improve adhesion.
Spot-check corners, glazing edges, and joints; remove any remaining ridges that would telegraph through topcoat. Finish by vacuuming and wiping with a damp cloth. Let it fully dry.
Repair Rot, Cracks, and Failing Caulk First
Before any primer or topcoat goes on, inspect the window frame for soft wood, open checks, and separated caulk lines, because paint won’t bridge movement or bond to decayed substrate.
Probe suspect areas with an awl; if fibers crush, cut back to sound wood and complete rot repair with a consolidant and epoxy filler, shaped flush after cure.
For hairline cracks, route them slightly with a utility knife so filler keys in, then sand smooth.
Remove failed caulk completely; don’t smear over it.
Clean joints, let them dry, then perform caulk application using an exterior-grade, paintable sealant.
Tool the bead to contact both sides, eliminate voids, and keep thickness consistent.
Let repairs cure fully before moving on.
Mask Glass and Siding for Sharp Lines
After the repairs have cured, mask off the glass and adjacent siding so you can cut clean paint edges without scraping overspray or brush marks later. Use high-quality exterior painter’s tape, 1–1.5 in. wide, and press it down with a plastic putty knife to seal the edge.
To mask glass, run tape 1/16 in. onto the frame line, then add masking film or paper to cover the pane. Keep tape straight by pulling short lengths and aligning to muntins or trim reveals.
Protect siding with wider tape plus paper, or a pre-taped drape, extending beyond the work zone. Avoid taping over wet caulk or dusty surfaces; wipe and dry first.
Remove tape only after paint tacks up.
Prime and Repaint Exterior Window Frames (Best Technique)
Although your masking is doing the cleanup work for you, you’ll get the most durable finish by priming bare wood and repaired spots first, then building full coats in a controlled sequence.
Spot-prime knots, end grain, and patched areas with an exterior bonding primer; feather the edges after it dries. If you’re matching historical accuracy, tint primer toward the finish color to prevent flashing.
Apply the first topcoat to muntins and sash details using a 1.5–2 in angled sash brush, then lay off in one direction to level.
Next, coat the outer frame and casing, keeping a wet edge. Let it cure per label, scuff-sand 220 grit, remove dust, then apply the second coat.
Verify color combinations in shaded daylight.
Frequently Asked Questions
How Often Should Exterior Window Frames Be Repainted in Harsh Climates?
In harsh climates, you should repaint exterior window frames every 3–5 years, sooner if coatings fail. Prioritize weather resistance, inspect annually for cracking, chalking, and peel. Maintain proper color contrast to minimize heat stress.
Can I Repaint Window Frames Without Removing the Existing Paint Completely?
Yes, you can, if the existing paint’s sound. You’ll prioritize paint preparation: scrape, sand, feather edges, clean, spot-prime bare areas. Then you’ll use controlled paint application techniques for even coverage, adhesion, durability.
How Do I Repaint Frames on Upper Stories Safely Without Ladders?
Picture reaching the top frame from inside—why risk a fall? You’ll use extension-pole tools, safety harnesses anchored to rated points, and scaffolding alternatives like mast climbers or lift platforms; set exclusion zones; verify load ratings.
What Color Choices Best Match a Clean, Modern Exterior Style?
You’ll match a clean, modern exterior with Color palettes like crisp white, charcoal, matte black, or warm greige, aligned to current Design trends. Pair with neutral siding, limit accents, and choose low-sheen finishes.
How Long Should I Wait Before Cleaning Windows After Repainting Frames?
Wait 7 days before cleaning windows; wait 14 days for maximum paint durability. You’ll use gentle cleaning techniques: soft microfiber, mild soap, low-pressure rinse. Don’t scrape or solvent-wipe, and avoid abrasive pads.