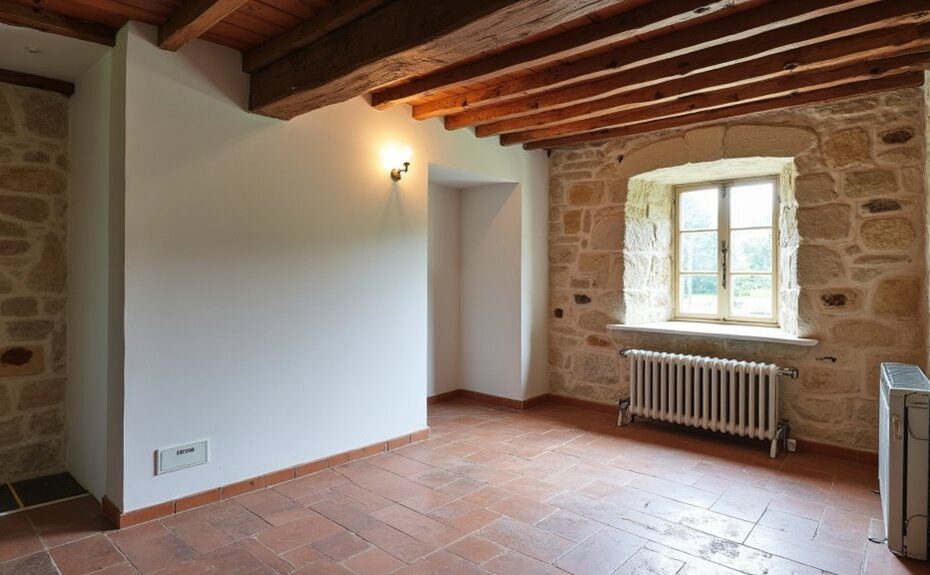
Start by surveying fabric and services to quantify heat loss (ISO 6946) and damp risk (BS 5250), validated with thermography and airtightness checks. Cut demand first with breathable, reversible loft and suspended-floor insulation while sealing drafts without killing background ventilation. Then match room-by-room heat loss to radiator output at your target ΔT, balance flows, and commission to BS 7593. Keep wet distribution, drop flow temps to 35–45 °C, and right-size an ASHP, biomass, or efficient boiler with proper flue/air. Next, you’ll see how zoning and weather compensation lock in efficiency.
Key Takeaways
- Survey fabric, damp risks, and existing services to quantify heat loss and plan upgrades without disturbing historic finishes.
- Prioritize reversible, breathable insulation and draught-proofing to cut demand while protecting moisture balance and ventilation.
- Reuse existing wet pipework, lower flow temperatures, and only upsize radiators or add fan convectors where heat loss demands it.
- Choose right-sized low-temperature systems like air-source heat pumps or compact biomass, considering electrical capacity, fuel storage, and servicing access.
- Upgrade controls with zoning, weather compensation, and proper commissioning to prevent short-cycling and maximize efficiency with minimal disruption.
Survey the Building, Heat Loss, and Damp Risks

Before you spec any new heating plant, you should survey the fabric and services to quantify heat loss and identify moisture pathways that could turn an upgrade into a damp problem.
Start with measured geometry and U‑value assumptions aligned to ISO 6946, then validate with thermography and airtightness testing so your heat-loss model reflects reality.
Map existing emitters, pipe routes, and electrical capacity, and log operating temperatures and control zones.
Inspect building materials at junctions—sills, eaves, chimney breasts—for cold bridges and salt contamination.
Check subfloor ventilation, rainwater goods, and ground levels against BS 5250 principles so moisture management stays robust when you raise internal temperatures.
Record RH and surface temperatures to flag interstitial and surface condensation risk, and specify monitoring points for commissioning.
Cut Heat Demand First (Insulation You Can Actually Do)
Although you can size a new boiler or heat pump to brute‑force comfort, you’ll get a better, lower‑risk outcome by cutting heat demand first with insulation measures that respect the building’s moisture balance. Prioritise reversible, breathable upgrades aligned with BS 5250 moisture control principles and heritage fabric constraints.
Start with airtightness at obvious leakage paths: seal window drafts using compressible gaskets, repair sash cords, and fit brush strips to doors while maintaining background ventilation.
Add thermal curtains with tight pelmets to reduce night‑time radiant losses without trapping moisture against cold glass.
Insulate lofts with vapour‑open materials, keep eaves clear for ventilation, and maintain access for inspection.
Where you can, line suspended timber floors from below with mineral wool and a wind‑tight, vapour‑open membrane. Avoid impermeable foams on damp masonry.
Check Radiators, Pipework, and Flow Temperatures
Once you’ve reduced heat loss with breathable insulation and basic airtightness, check whether the wet heating system can deliver the required output at lower flow temperatures.
Measure room-by-room heat losses (W) and compare them with radiator outputs corrected to your target ΔT, not the legacy 80/60°C assumption.
If outputs fall short, improve radiator efficiency by upsizing panels, adding convectors, or fitting fan-assisted emitters while keeping TRVs and lockshields balanced.
Verify pipework diameters, pump head, and system differential pressure to maintain design flow rates and avoid noise.
Add pipe insulation to all accessible primary runs, especially in voids and unheated spaces, to reduce distribution losses and protect against freezing.
Finally, commission to BS 7593: flush, dose inhibitor, and record flow/return temperatures at steady state.
Choose Modern Heating for Rural Power and Access Limits
Where do you start when your nearest three‑phase supply is miles away and LPG deliveries depend on passable lanes? You size heat demand first, then audit electrical capacity, voltage stability, and earthing to BS 7671, plus metering and DNO export limits (G98/G99).
If supply is weak, you prioritise staged loads, soft‑starts, and thermal storage to cap peak kVA and avoid nuisance trips. You also check fuel resilience: biomass needs dry storage and ENplus‑grade pellets; oil needs bunding and access; direct electric needs tariff control and robust cables.
For renewable energy, integrate PV with an inverter/charger and battery so critical pumps and controls ride through outages. That architecture improves grid independence without overloading rural feeders today.
Low-Disruption Air-Source Heat Pumps for Older Homes
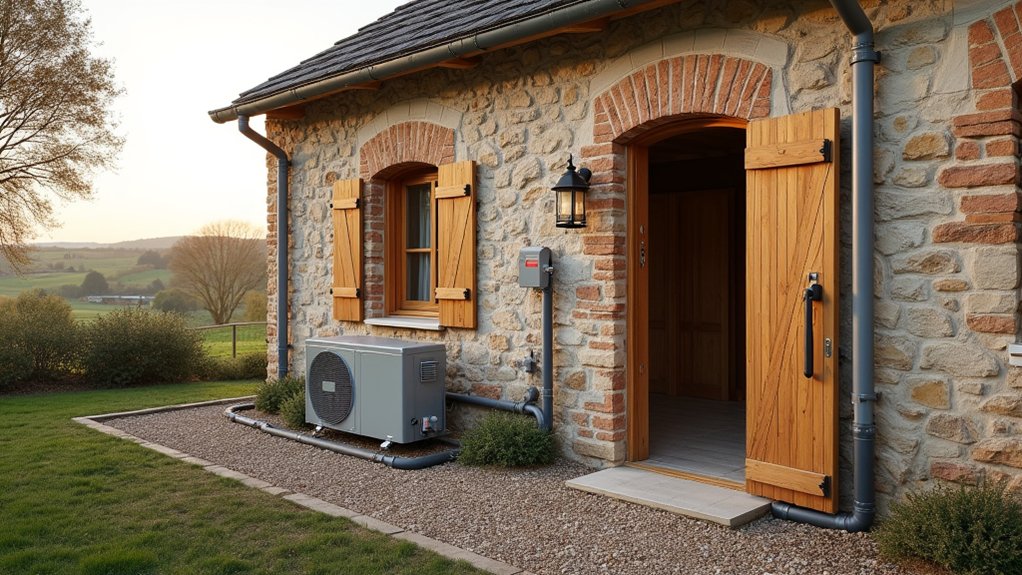
If you need to upgrade heat in an older rural home without ripping out floors or replumbing every circuit, specify an air‑source heat pump (ASHP) around a low‑disruption retrofit strategy: keep the existing wet distribution where it performs, drop flow temperatures to a proven design point (typically 35–45 °C), and add targeted emitter upgrades rather than a full overhaul.
You’ll start with a room-by-room heat-loss calculation and set weather compensation to meet that design load at low flow. You can retain radiators where output is adequate, but you’ll upsize key emitters or add fan convectors in weak rooms. If you’re already opening a small zone, you can add underfloor heating to stabilise temperatures.
Integrate solar thermal via a correctly controlled cylinder coil, prioritising DHW and avoiding ASHP short-cycling. Commission to MCS/EN 12828 principles.
Compact Biomass Heating When Logs/Pellets Suit You
If you’re considering compact biomass, you’ll choose between logs and pellets based on fuel supply chain, automation level, ash handling, and emissions performance against applicable standards.
You’ll then size the boiler and buffer tank as a system and confirm your flue, combustion air, and clearances meet manufacturer instructions and local code.
For placement, you’ll site the unit to minimize pipe runs and service access while keeping fuel storage dry and appropriately separated to meet fire-safety requirements.
Selecting Logs Vs Pellets
Although both fuels can deliver compact biomass heat in an old rural building, you’ll get the best outcome by matching logs or pellets to your site constraints, operating regime, and maintenance capacity.
For Logs selection, specify seasoned fuel at ≤20% moisture, consistent length, and traceable origin. You’ll protect combustion stability, reduce tar, and keep flue-gas temperatures within design limits. You’ll also need higher manual handling and periodic de-ashing, so align this with staffing and access.
For Pellets benefits, choose ENplus A1 (or equivalent) to control fines, ash content, and calorific value. You’ll enable automated feed, tighter modulation, and more predictable emissions compliance.
Check your electrical resilience and service availability, because augers, sensors, and controls must run reliably.
Compact Boiler Placement Tips
Because compact biomass boilers concentrate heat, fuel, and flue-gas management in a small footprint, you should place the unit where you can maintain compliant clearances, straight access for servicing, and a shortest-practical flue route that meets the manufacturer’s specification and applicable standards.
Put it on a non-combustible base with vibration control, and keep ash removal and fuel loading paths dry and unobstructed.
Choose a location that supports safe condensate drainage, pressure relief discharge, and expansion vessel access.
Plan pipe routing to minimize bends, isolate with service valves, and keep flow/return runs balanced for low head loss.
Coordinate radiator placement early so you avoid long branches, cold rooms, and oversized emitters.
Leave space for buffer tank connections, automatic de-aeration, and flue inspection points.
Guarantee fire separation where required.
Upgrade to a High-Efficiency Boiler With Minimal Change

You can often cut fuel use fast by swapping in a condensing, high-efficiency boiler while keeping most of the existing distribution.
But you must plan the swap around heat-loss, flow/return temperatures, and safe tie-ins to legacy pipework.
You’ll then update the flue and combustion air/venting to meet current manufacturer instructions and applicable codes for condensate handling, materials, and clearances.
Finally, you’ll upgrade controls with outdoor reset, proper zoning, and balanced emitters so the whole system stays stable, compliant, and efficient.
Boiler Swap Planning
When a rural building’s heat distribution is basically sound, a boiler swap delivers the biggest efficiency gain with the least disruption. Start by confirming your existing emitters, pipe sizes, and zones meet the new boiler’s required flow and temperature range.
Then size the appliance to your building heat loss per recognised methods (e.g., CIBSE/BS EN 12831). Specify weather compensation, load matching, and pump modulation to protect energy efficiency and reduce cycling.
Plan controls integration so you don’t disturb occupied areas: reuse thermostats where compatible, or add a wiring centre at the plant room.
Schedule a system flush, magnetic filtration, and water treatment to meet manufacturer and BS 7593 expectations.
Check combustion air provisions and existing ventilation solutions capacity during the plant-room survey, without altering flues.
Flue And Vent Updates
How can a high‑efficiency boiler upgrade stay low‑impact if the flue and ventilation were sized for an older appliance? You start by verifying appliance category, flue gas temperature, and required draft per manufacturer instructions and local code.
Then you inspect the existing chimney for integrity, clearances, and condensate tolerance.
If you’re moving to condensing operation, you’ll usually need chimney lining to prevent acidic condensate damage and to match the reduced flue volume. Select listed, compatible flue materials (AL29‑4C stainless, polypropylene, or concentric systems) and keep jointing, supports, and slope per the certification.
Provide combustion air openings sized to the new input and room volume, or convert to sealed, direct‑vent to avoid depressurization. Finally, confirm termination location, plume management, and access for inspection and cleaning.
Controls And Zoning Upgrade
Although a high‑efficiency boiler can run on basic on/off calls, a low‑impact retrofit usually hinges on updating controls and zoning so the system meets manufacturer commissioning requirements and modern hydronic best practice without reworking distribution.
You’ll add outdoor reset, boiler interlocks, and pump control so return temperatures stay in condensing range and minimum flow is maintained per the I&O manual.
For Thermostat integration, use a compatible control or relay panel that provides DHW priority, post‑purge, and fault reporting without splicing legacy wiring.
Apply zoning strategies that match your emitters: zone valves for low head loss, or ECM circulators with differential pressure control for multiple branches.
You’ll also add a properly sized bypass or hydraulic separator to prevent short‑cycling and protect heat exchanger limits.
Add Smart Controls and Zoning to Reduce Running Costs
Because rural buildings often have mixed insulation levels and intermittent occupancy, you’ll cut running costs fastest by adding smart controls and zoning that match heat output to actual demand. Specify Smart thermostats with open protocols (e.g., OpenTherm, Modbus) so boilers or heat pumps can modulate rather than short-cycle, and use weather compensation to stabilise flow temperature.
Apply zoning strategies aligned to building fabric: separate high-loss rooms, bedrooms, and rarely used wings into independent zones with actuated valves and room sensors.
Commission setpoints, deadbands, and minimum run-times to meet manufacturer requirements and maintain seasonal efficiency. Add occupancy schedules and setback temperatures that protect against damp while reducing standby losses.
Verify performance by logging run hours, flow/return temperatures, and zone calls, then rebalance emitters and hydraulic circuits to keep ΔT within design limits.
Frequently Asked Questions
How Long Does Planning Permission Take for Heating Upgrades in Listed Buildings?
You’ll typically wait 8–13 weeks, but here’s the catch: Historic conservation reviews can extend it to 16+ weeks. You’ll speed approval by submitting compliant drawings, heritage statements, and energy efficiency calculations aligned with standards.
What Grants or Financing Options Are Available for Rural Heating Improvements?
You can use financial incentives like government grants, low-interest retrofit loans, utility rebates, and green mortgages. You’ll typically need an EPC, installer certification (MCS), and scheme compliance evidence to qualify and release funds.
Will My Home Insurance Change After Installing a Heat Pump or Biomass System?
Your premiums or terms can change; you’ll need to notify your insurer and provide commissioning and compliance evidence. Insurance implications depend on System compatibility, certified installers, fire risk controls, and updated rebuild valuations after installation.
How Do I Choose an Installer Qualified for Heritage and Off-Grid Properties?
Choose an installer like a master key: verify heritage conservation experience, request PAS 2035-style retrofit assessment, check MCS/RECC and biomass HETAS credentials, demand off grid solutions designs, references on listed buildings, and commissioning documentation.
What Maintenance Schedule and Costs Should I Expect for Each Heating System?
You’ll schedule annual servicing for boilers, stoves, and heat pumps; biannual chimney sweeps for solid fuel. Maintenance cost estimates: $150–$500/year plus filters. Heating system lifespan: 10–25 years; budget major overhauls every decade.