
You can convert an old dairy building into family living space if you confirm zoning, septic/well, floodplain, and any historic review triggers first. You’ll stabilize the roof, framing, and foundation, then fix drainage, damp slabs, and lingering odors with drying, repointing, and targeted dehumidification before you insulate. Keep MEP runs tight by stacking wet rooms and using existing chases, and plan kitchens and mudrooms around former alleys and doors. Keep going to see costs, assemblies, and layout moves.
Key Takeaways
- Verify zoning, septic/well, floodplain, and preservation rules early, and confirm egress, stairs, and ceiling heights meet residential code.
- Start with a full condition assessment of foundation, roof framing, moisture damage, pests, hazardous materials, and fire separation needs.
- Control moisture and odors by improving site drainage, drying damp zones, repointing masonry with lime, and sealing cleaned surfaces after treatment.
- Budget realistically: $150–$250/ft² for light upgrades, $300–$450+/ft² for full rebuilds, plus 10–20% for permits and engineering.
- Preserve character while modernizing by reusing structural bays, stacking wet rooms, and routing MEP through existing chases, soffits, or discreet service walls.
Can Your Dairy Building Become Living Space? (Checklist)
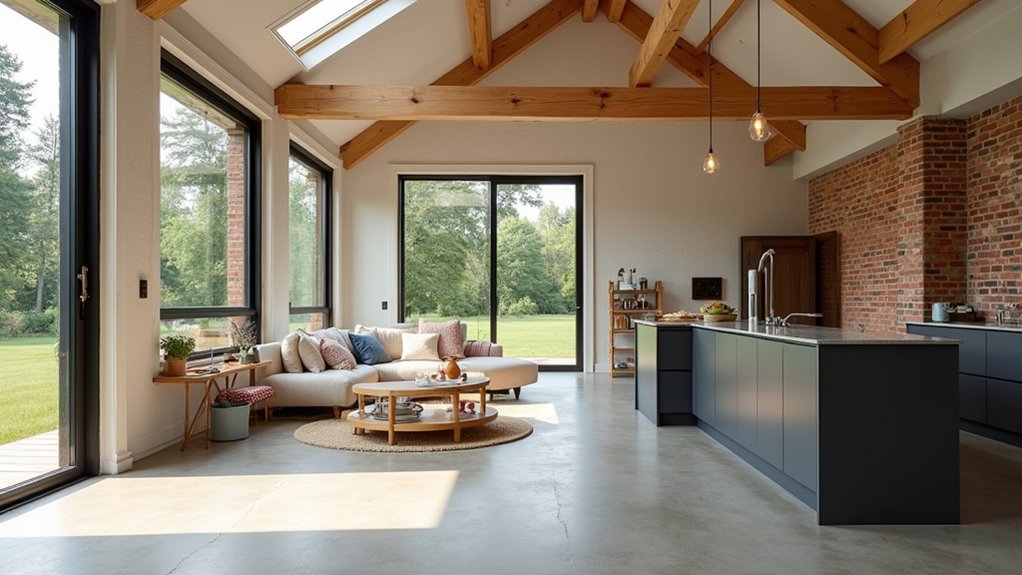
Before you start sketching floor plans, you need to confirm that your old dairy building can legally and physically support habitable use without sacrificing its historic fabric. Start with zoning regulations: verify permitted residential use, setbacks, parking, septic/well approvals, and any floodplain or agricultural overlays.
Next, map Historical preservation triggers: landmark status, easements, or district review, and document character-defining features you must retain.
Then run a building checklist: foundation stability; roof framing and load paths; moisture sources and drainage; masonry condition; pests; hazardous materials; and fire separation requirements.
Confirm egress locations, stair geometry, and ceiling heights. Plan utilities within existing chases, milk-room voids, or former feed alleys to minimize new penetrations.
Test daylight and ventilation potential before committing partitions.
Dairy Conversion Costs: Biggest Drivers and Ranges
Although every dairy conversion prices out differently, your budget will swing hardest on a few predictable drivers: how much structural and envelope repair you must do to stabilize the shell, how aggressively you need to manage moisture and contaminants, and how far you’ll push new MEP systems (HVAC, plumbing, electrical) without cutting up character-defining masonry, framing, or original openings.
Next, count selective demolition and salvage: removing dairy equipment, capping lines, and reusing steel, brick, or timber can lower disposal and finish costs. Milking stations often dictate slab cuts, floor-leveling, and layout efficiency; keeping their rhythm can reduce framing while preserving authenticity.
Expect wide ranges: light-touch shells with modest MEP upgrades may land around $150–$250/ft², while full rebuilds with high-performance envelopes and custom inserts can hit $300–$450+/ft². Permits, engineering, and code upgrades add 10–20%.
Fix Moisture, Odors, and Drainage First
If you don’t solve moisture, odors, and site drainage at the outset, every finish you add will trap the dairy’s legacy problems and accelerate decay in historic masonry and framing.
Start outside: regrade to shed water, extend downspouts, add swales, and keep splashback off walls with gravel drip lines.
Inside, map damp zones, then prioritize moisture mitigation with capillary breaks, breathable lime-based repointing, and targeted dehumidification over impermeable coatings that lock salts in.
Remove contaminated slab toppings, clean joints, and seal only after drying cycles stabilize.
For odor elimination, strip organic residues, enzymatically treat porous surfaces, and vent cavities with discreet, low-energy exhaust paths.
Detail bathrooms and kitchens to isolate humidity, and keep mechanical runs tight to preserve usable floor area.
Strengthen Roof, Framing, and Foundations for a Home
Once you’ve stabilized moisture and air quality, you can evaluate the dairy’s structural shell as a load path you’ll repurpose for residential code demands rather than agricultural tolerance.
Start by mapping rafters, purlins, and truss joints, then specify Roof reinforcement where spans sag or snow loads exceed capacity. Sister compromised members, add discreet steel plates, and tighten connections with rated fasteners while preserving original timbers.
Verify lateral resistance: brace bays, sheath selectively, and tie roof-to-wall with hurricane straps to prevent racking.
At the base, confirm bearing conditions and settlement history before finishes hide evidence.
For Foundation stabilization, underpin weak footings, stitch cracks, and add interior grade beams or helical piers when soils vary.
Detail capillary breaks and sill anchors so the upgraded frame stays plumb and efficient.
Family-Friendly Layout: Kitchen, Mudroom, and Zones
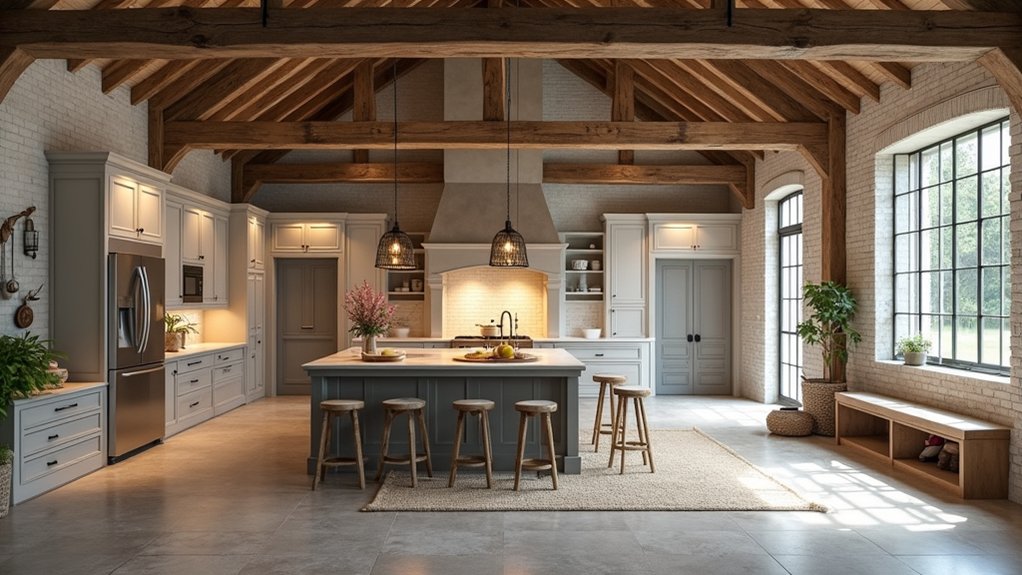
Before you frame new walls, plan a family-friendly layout that works with the dairy’s existing bay rhythm, door openings, and structural posts instead of fighting them.
Place the kitchen along a former feed alley so you can run straight utility chases, keep sightlines to a play zone, and preserve clear spans.
Convert a wide exterior door into a mudroom entry: add a bench, boot trough, and tall lockers, and keep it on a washable floor zone.
Use half-height partitions or built-ins to define dining, homework, and lounge areas while keeping daylight moving through original openings.
Align interior decor with salvaged framing: open shelving, restrained finishes, and reversible fasteners.
Tie paths to landscaping design with a covered stoop and a gravel drop zone.
Insulate a Dairy Barn Without Mold Problems
To insulate a dairy barn without mold, you’ve got to control bulk water, capillary wicking, and indoor humidity before you close in cavities.
You’ll pair the right vapor barrier strategy with continuous ventilation so the historic framing can dry safely while you keep wall thickness and headroom efficient.
Then you’ll choose insulation materials—such as closed-cell spray foam, mineral wool, or dense-pack cellulose—based on drying potential, air-sealing needs, and pest resistance.
Moisture Control Strategies
Although an old dairy barn can feel dry most days, its framing and masonry still store years of moisture from livestock use, washdowns, and ground contact, so your insulation plan has to manage vapor and bulk water as carefully as it manages R‑value.
Start with exterior drainage: regrade, extend downspouts, and add a capillary break at slab edges so moisture can’t wick into sills. Seal manure gutters and washdown channels before you finish floors.
Use borate-treated or naturally durable wood at splash zones, and keep insulation clear of masonry that shows efflorescence until you’ve repointed with lime-compatible mortar.
For humidity regulation, integrate dehumidification sized to the new volume and monitor with sensors.
For mold prevention, keep cavities accessible for inspection and avoid trapping damp, historic boards behind tight finishes.
Vapor Barriers And Ventilation
Because dairy barns were designed to dry by leaking air rather than by controlled assemblies, you can’t just add insulation and a sheet of plastic and expect the walls to behave. Map seasonal vapor drives and locate the primary Vapor barriers where they protect framing yet still allow historic boards to dry in at least one direction. Favor smart retarders and taped, serviceable air-control layers instead of interior polyethylene that can trap moisture against cold siding.
Then make ventilation deliberate. Seal random leaks, but keep drying capacity with a balanced HRV/ERV sized to your new occupancy, plus spot exhaust for baths, laundry, and mudroom entries. Maintain slight neutral pressure and provide a vented attic or roof channel so moisture doesn’t migrate into hayloft cavities.
Monitor RH and adjust setpoints seasonally.
Insulation Material Selection
Once you’ve set a sane air-control and vapor strategy, insulation choice becomes the main lever for keeping a converted dairy barn dry while preserving original boards and maximizing interior inches.
Start with a Material comparison focused on hygrothermal behavior, not just R-value. Closed-cell spray foam gives high R per inch and air sealing, but it can trap moisture against historic sheathing if you can’t confirm exterior drying.
Open-cell foam dries inward but needs a reliable interior vapor retarder and ignition protection.
Dense-pack cellulose buffers moisture and fills irregular cavities, yet you must keep bulk water out and control interior humidity.
Mineral wool resists mold and keeps its shape; pair it with meticulous air sealing.
Among Insulation types, favor assemblies that allow at least one drying direction and fit your framing without furring.
Run Plumbing, Electrical, and HVAC Without Losing Character
When you retrofit an old dairy building, you can route plumbing, electrical, and HVAC in ways that meet modern code without sacrificing the original timbers, masonry, and stall-era details. Use chases in former feed alleys, corner soffits, or new service walls so you don’t notch beams. Keep runs short by stacking wet rooms and placing manifolds near a utility core.
For electrical, surface-mount conduit can suit Historical preservation when you align it with existing framing bays and paint it to match; you’ll get aesthetic integration without hiding damage. Use shallow raceways behind baseboards where allowed.
For HVAC, choose ducted mini-splits or high-velocity systems; route small ducts through joist cavities and use floor grilles in reversible platforms. Seal penetrations with fire-rated, removable collars.
Windows and Doors for Light and Indoor-Outdoor Flow
Although dairy buildings often start with small, utilitarian openings, you can dramatically improve daylight and indoor–outdoor flow by upgrading windows and doors in a way that respects historic proportions and minimizes structural intervention.
Survey load paths before enlarging openings; whenever possible, reuse existing bays and install insulated glazing within original jamb lines. If you must widen, add a concealed steel lintel or sistered LVL, and keep header heights aligned to maintain Farmstead aesthetics.
Choose divided-lite or simulated muntins that echo sash patterns, and specify thermally broken frames for condensation control.
For doors, convert hay portals into sliding or lift-and-slide units, but retain exterior track boards and trim for barn preservation.
Add operable clerestories for stack ventilation, and use flush thresholds to improve accessibility.
Frequently Asked Questions
Do Dairy Conversions Affect Property Taxes or Trigger Reassessments?
Yes, you’ll often trigger a reassessment and higher taxes when you convert or materially improve structures. Tax implications depend on permits, square footage, and use changes; valuation adjustments may reflect preserved elements, energy upgrades, and optimized layouts.
Can You Qualify for Historic Preservation Grants or Agricultural Reuse Incentives?
Yes—you can, if you meet eligibility. For example, you rehab a 1920s barn: you’ll document character-defining features, pursue Heritage funding, and stack Agricultural incentives by retaining production use and optimizing interior layouts.
How Do You Handle Zoning Changes From Agricultural to Residential Use?
You handle zoning changes by meeting planners early, filing a rezoning/conditional-use packet, and documenting building material safety and ventilation systems upgrades. You’ll preserve envelopes, optimize setbacks/parking, address septic/water, and secure written approvals.
What Insurance Coverage Is Needed During and After the Conversion?
You’ll need builder’s risk and general liability during work; after, switch to homeowners with dwelling, contents, and umbrella. Test the theory that Insurance policies must mirror hazards; verify Coverage requirements for historic fabric, code upgrades, and space changes.
How Long Does Permitting and Inspection Typically Take for a Dairy Conversion?
You’ll typically spend 2–6 months on permitting and inspections, longer if variances arise. You’ll meet Building safety reviews, staged rough/final sign-offs, and align Construction timelines with preservation details and space-optimizing code upgrades.