
Nearly 40% of renovation cost overruns trace back to poor measurements and layout changes. You start by measuring your ensuite and mapping code-required clearances for the door swing, toilet, and shower access. You’ll keep the plan tight with wall-hung fixtures, recessed niches, a slim tray or wet-room floor, and a frameless screen that doesn’t crowd sightlines. Then you use layered lighting, a full-height mirror, and large-format tile to stretch the room—if you prioritize the right trade-offs first…
Key Takeaways
- Measure the room and map plumbing, studs, and circulation to keep the layout tight and avoid costly relocations.
- Prioritize door and shower-screen swing clearances; use outswing or pocket doors and sliding screens to save floor space.
- Choose compact or wall-hung toilets and slim vanities, maintaining code clearances while maximizing open sightlines.
- Add recessed niches and wall-mounted cabinets anchored to studs to increase storage without reducing walkway width.
- Use low-profile shower trays or wet-room linear drains, plus bright lighting and large-format tiles to make the ensuite feel bigger.
Measure Your Ensuite and Map Clearances
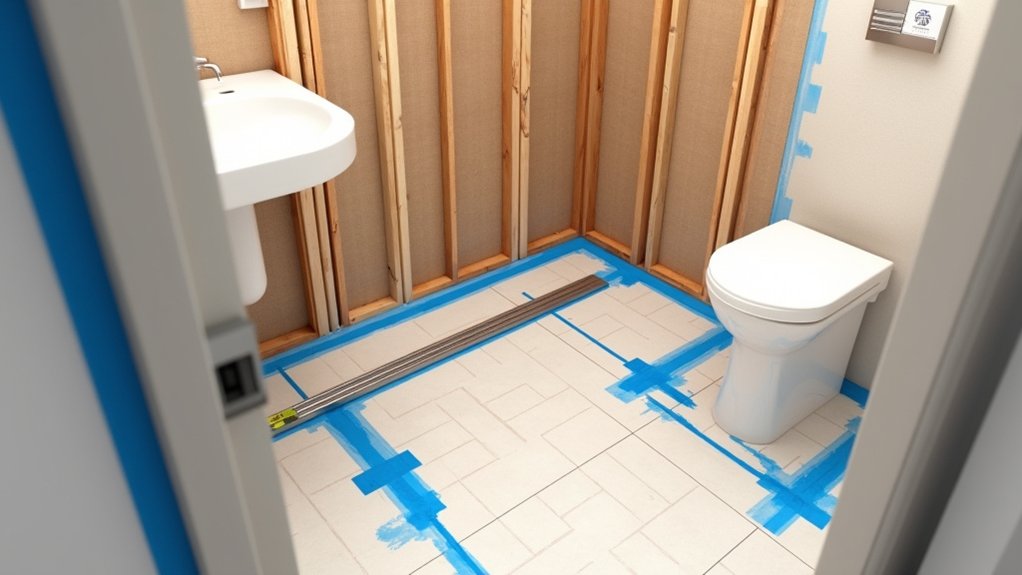
Before you pick fixtures or finishes, measure your ensuite with a tape measure (or laser) and sketch a simple plan showing wall-to-wall dimensions, door swings, window locations, and plumbing rough-ins.
Record ceiling height, soffits, and joist direction so you can route ducts and set recessed lighting without conflicts.
Plot required clear floor area at the vanity, shower entry, and toilet, and keep circulation paths straight for safer movement.
Mark stud locations and note load-bearing walls before you move supply or waste lines.
Use the plan to test furniture arrangement: vanity depth, towel storage, and hamper placement shouldn’t pinch walkways.
Finally, locate existing fan, exterior wall access, and duct runs so you can select ventilation solutions that meet local exhaust rates and minimize bends.
Fix Door and Screen Clearance First
Because door and screen swings control how the room functions, lock in their clearances first and adjust the layout around them. Confirm the entry door’s handing, swing arc, and Door clearance to avoid collisions with the shower screen, towel rails, or fittings.
If the code allows, switch to an outswing or cavity slider to keep the floor area usable and reduce pinch points. Maintain a clear, unobstructed path from the doorway to the shower and basin zone.
Set the shower screen type early—pivot, bi-fold, or sliding—then verify screen accessibility: you should step in without twisting around glass edges or hardware.
Allow practical standing room at the opening and keep hinges, handles, and seals clear of walls. Check thresholds, waterproofing falls, and ventilation grilles for conflicts.
Choose Space-Saving Toilet and Vanity Sizes
After you’ve locked in door and screen clearance, you can reclaim floor area with a compact-toilet footprint that still meets required rough-in and clearance dimensions.
You’ll also want a slimline vanity with reduced depth and full knee/door swing clearance, so circulation stays code-compliant.
If square footage is tight, you can specify wall-hung toilets and vanities to keep the floor plane open and simplify cleaning while maintaining required fixture spacing.
Compact Toilet Footprints
Whether you’re remodeling a tight powder room or shrinking a full bath layout, choosing compact toilet and vanity footprints lets you meet code clearances without wasting inches. Start by confirming required clearances: allow 15 inches from toilet centerline to each side wall or obstruction, and at least 21 inches in front for legroom (30 inches is better when you can).
For Toilet placement, keep the bowl aligned with the main drain to avoid offset flanges that steal space and complicate venting. Consider a round-front bowl or a compact elongated model with a shorter projection.
A wall-hung toilet can reclaim floor area and simplify cleaning, but verify in-wall carrier depth.
Prioritize Water efficiency with EPA WaterSense models and reliable 1.28 gpf performance for savings.
Slimline Vanity Dimensions
Once you’ve tightened the toilet footprint, you can win back even more room by sizing a slimline vanity that still leaves proper clearances at the sink and door swing.
Aim for 400–500 mm depth (16–20 in) instead of the usual 550 mm, and keep width to 600–750 mm (24–30 in) for a single basin.
Maintain at least 530 mm (21 in) clear floor space in front of the basin and avoid placing the vanity where it pinches the door arc.
Set the rim height around 850–900 mm (34–36 in) for comfortable use.
Choose a moisture-tolerant vanity material like plywood or PVC, and a thin-profile countertop style (compact laminate or solid surface) to maximize knee and drawer space.
Wall-Hung Fixture Options
If you need maximum floor area in a tight bath, wall-hung fixtures deliver the biggest visual and functional gain because you can keep the footprint shallow while preserving required clearances.
Choose a wall-hung toilet with an in-wall carrier rated for load and set the bowl so you maintain code-required side clearance (often 15 in. from centerline) and front clearance (often 21 in. minimum).
Pick a compact projection bowl (around 21–24 in.) to reduce intrusion into the aisle.
For the vanity, select floating fixtures 18–21 in. deep and 24–36 in. wide, with a wall-hung trap or concealed drain to keep knees and cleaning access clear.
Use wall mounted options with blocking, waterproofing, and service access panels.
Pick a Slim Shower: Tray, Wet Room, or Screen
To keep your shower footprint tight, you’ll choose between a slim tray, a wet room layout, or a minimalist screen.
You can spec low-profile trays in standard or offset sizes, or go wet room with a linear drain and correct fall to free up floor area.
If you prefer the lightest visual load, you’ll install a frameless or semi-frameless screen sized to code clearances and splash control.
Slim Shower Tray Options
Although bulky bases used to be the default, slim shower tray options now let you keep a near-level entry while still meeting practical drainage and waterproofing requirements. Choose low-profile stone resin, acrylic-capped, or enamelled steel trays; each supports a minimalist design while offering different material durability and slip ratings.
Verify the tray’s stated height, waste position, and compatible trap depth so you can maintain the required fall to the outlet without raising the floor. Use a manufacturer-approved sealing kit, perimeter upstands where specified, and continuous waterproofing behind wall boards to meet typical bathroom codes.
Specify a fast-flow waste for high-output showers, and insist on access to the trap for maintenance. Select a size that preserves door swing and minimum clearances.
Space-Saving Wet Room Layouts
When floor area runs tight, a wet room layout can give you a bigger-feeling shower zone without sacrificing code-friendly drainage and waterproofing. Set the shower at the room’s far end so the main path stays dry, and slope the floor 1:60–1:80 toward a linear or central drain.
Build a continuous, sealed membrane up walls and at all penetrations, then specify a bonded flange drain to maintain the waterproof layer. Keep clearances by recessing the trap where allowed and confirming joist/notch limits.
Use Floating fixtures like a wall-hung vanity and toilet to open sightlines and simplify cleaning. Plan space-efficient layouts with a single wet zone that also serves the bath entry, and choose slip-resistant tile for safety.
Minimalist Shower Screen Choices
If you want a clean, minimalist shower that still meets waterproofing and clearance requirements, start by choosing the right slim profile: a low-threshold tray, a true wet-room floor with a bonded drain, or a near-invisible fixed glass screen.
A tray suits timber floors and faster installs; specify a low curb and confirm fall to waste.
A wet room buys the most footprint, but you must detail full-tank membranes, a compatible bonded drain, and continuous floor gradients.
If you pick a screen, keep swing arcs off doors and vanities, and anchor into studs or blocking.
Choose Glass options like 10mm toughened, low-iron, or easy-clean coatings for fewer water marks.
For frame styles, go frameless with minimal channels, or semi-framed for extra rigidity.
Match hardware to corrosion ratings.
Add Wall-Hung Storage and Recessed Niches
To free up floor space without sacrificing function, add wall-hung storage and recessed niches where you need them most. Choose Wall mounted cabinets above the toilet or vanity to keep the circulation path clear and maintain required clearances at the door swing and fixtures. Anchor into studs or use rated blocking, and select moisture-resistant carcasses with sealed edges. Keep cabinet depths slim so you don’t encroach on the minimum walkway.
Build Recessed shelves into stud bays in the shower or beside the basin for daily essentials. Waterproof the niche with a continuous membrane, pitch the sill slightly to drain, and use nonabsorbent finishes.
Place niches outside spray where possible, and keep electrical zones and plumbing vents uncompromised. You’ll gain storage without crowding.
Use Lighting and Mirrors to Double Brightness
Although a bathroom can feel boxed-in by tile and hard edges, you can make it read larger by pairing layered lighting with mirrors that bounce illumination where you need it.
Start with dimmable ambient lighting: a ceiling-rated, damp-location fixture sized to the room, on an accessible switch, gives even coverage without glare.
Add task lighting at the vanity with vertical sconces or an integrated bar, mounted to keep shadows off your face and wired to code in wet zones.
Then refine mirror placement: center it on the sink, extend it close to the light sources, and consider a full-height panel to reflect the doorway view.
Use LED lamps at 2700–3000K, high CRI, and keep drivers serviceable.
Choose Tiles and Grout That Visually Expand Space
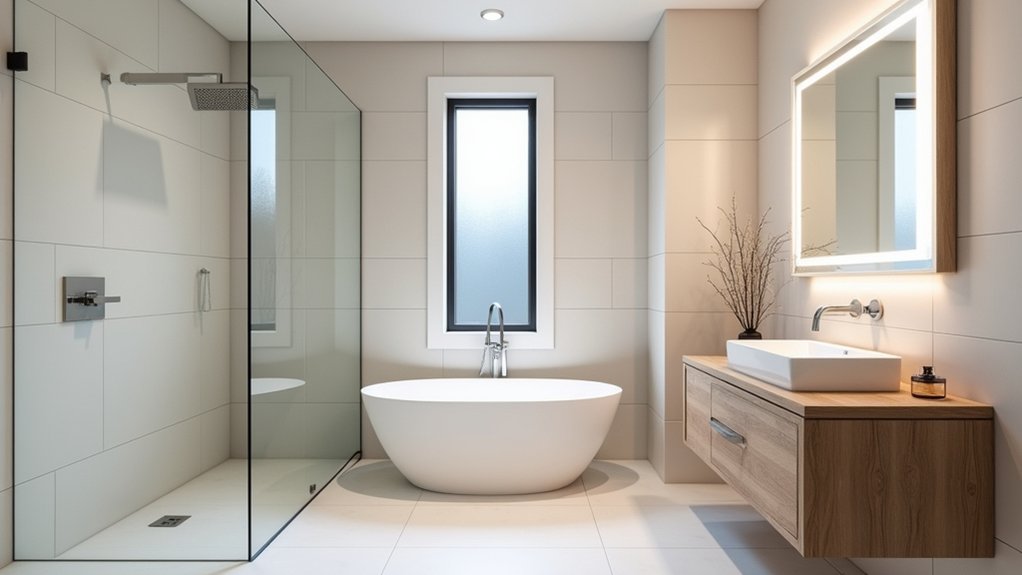
When you choose tile size, layout, and grout color with intention, you can make a tight bathroom read wider and taller without moving a single wall. Pick larger-format tiles to reduce visual breaks, and run them on a 1/3 offset or straight stack for clean lines that don’t fight the room’s geometry.
Use light, matte finishes on floors to limit glare while keeping slip resistance. On walls, carry the same tile into the shower to avoid abrupt transitions and keep waterproofing details continuous.
Minimize Color contrast by selecting grout close to the tile tone; this softens joints and makes surfaces feel larger. If you want definition, limit high-contrast grout to one feature plane and keep grout patterns aligned at corners, niches, and valve centers for a precise, intentional look.
Set a Compact Ensuite Budget and Priorities
Three decisions set your compact ensuite budget fast: your fixed “can’t-move” items (plumbing locations, venting, and electrical capacity), your must-haves (shower size, storage, lighting), and your finish tier.
Price relocations first; moving drains, supply lines, or circuits often triggers permits and inspections, plus wall/floor patching. Keep layouts tight to reduce labor and waterproofing risk.
Next, rank performance items: a code-sized exhaust fan vented outdoors, a properly sloped shower pan, and GFCI-protected receptacles.
Then pick finishes that stretch dollars: durable porcelain, simple trim, and unified Color schemes that reduce visual clutter.
Set a 10–15% contingency for hidden rot or subfloor leveling, and buy fixtures early to avoid rough-in changes.
Frequently Asked Questions
Do I Need Planning Permission or Building Regulations Approval for an Ensuite Renovation?
Permission’s rarely required; planning’s needed only if you alter structure, add windows, or change use. You’ll need building regs for plumbing, electrics, ventilation, drainage, and waterproofing—even with luxury fixtures and eco friendly materials.
How Long Does a Typical Compact Ensuite Renovation Take From Start to Finish?
You’ll usually finish a compact ensuite renovation in 2–4 weeks, depending on Luxury fixtures lead times and Space saving layouts complexity. You’ll add time for permits, inspections, drying/curing, and any hidden plumbing/electrical defects.
What Ventilation Rate or Extractor Fan Size Is Best for a Small Ensuite?
Aim for 8 air changes/hour—most small ensuites land at 60–80 CFM; that’s the stat. Prioritize ventilation efficiency, choose 1.5–2.0 sones for fan noise reduction, and duct outside with backdraft damper.
Should I Install Underfloor Heating in a Compact Ensuite Bathroom?
Yes, you should—underfloor heating boosts comfort without stealing floor space. Choose electric mats with an RCD, thermostat, and waterproofing. Pair Luxury fixtures with Space saving solutions, and verify floor buildup, clearances, and ventilation.
How Can I Soundproof an Ensuite to Reduce Noise Into Bedrooms?
You’ll soundproof an ensuite by sealing gaps, adding soundproofing techniques like resilient channels, and installing noise reduction materials: mineral wool, acoustic drywall, and door sweeps. Isolate pipes, mount fans on grommets, and use STC-rated doors.