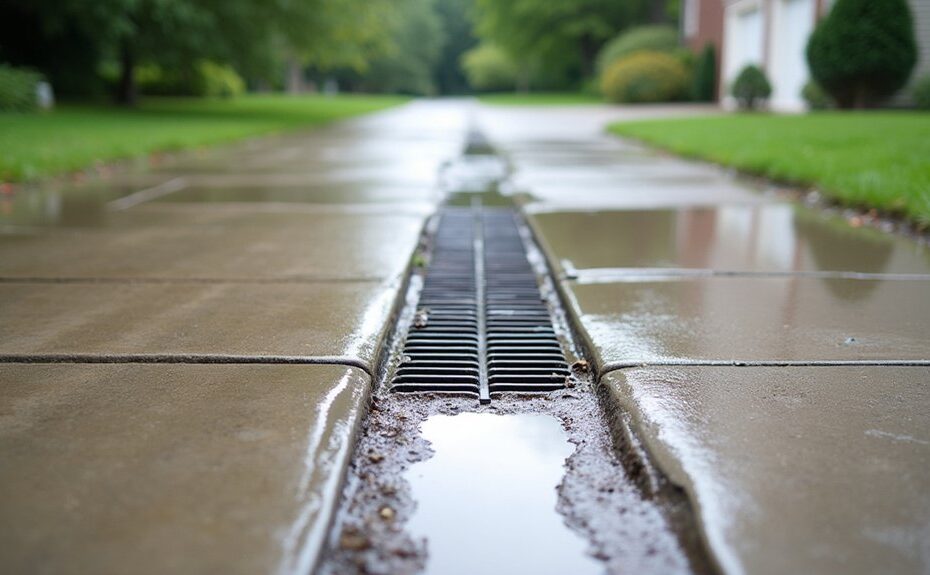
You don’t need to replace your driveway to stop standing water; you need measurable drainage corrections. Start by confirming three indicators: persistent ponding after 24 hours, staining or raveling at low points, and flow toward the garage or foundation. Then you set a code-sensible target—at least a 2% cross-slope away from structures—with 1–2% swales and the right drain type where sheet flow can’t work. The next step determines whether you fix it permanently or just move the problem.
Key Takeaways
- Map ponding areas after a 1-inch rain; puddles lasting over 24 hours signal clogged inlets or inadequate driveway slope.
- Regrade to a 2% cross-slope away from structures and a 1–10% longitudinal slope to keep runoff moving.
- Shape shallow edge swales with a continuous 1–2% fall and tie them into inlets or landscape basins for safe conveyance.
- Patch low spots in thin, compacted lifts; prepare edges and use proper bonding/tack coats so repairs shed water instead of trapping it.
- Add a load-rated trench/channel drain at the garage threshold and keep grates, laterals, and outlets clear to prevent backups and surface damage.
Diagnose Your Driveway Drainage Problem (3 Signs)

Before you choose a fix, you need to confirm what’s actually failing: surface grading, soil infiltration, or the collection system. Start with three field signs you can measure and document for a code-compliant plan.
1) Persistent puddles longer than 24 hours after a 1-inch rain indicate inadequate conveyance or a clogged inlet. Mark pond limits with chalk and note depth.
2) Sediment streaks, raveling, or efflorescence along joints show runoff is concentrating and degrading the driveway material (asphalt, concrete, pavers). Photograph and map the flow path.
3) Water at the slab edge or against the garage stem wall signals interception failure; verify downspouts, trench drains, and discharge points aren’t blocked and meet local outlet rules. Confirm landscaping compatibility before rerouting flows near roots or beds.
Set the Right Driveway Slope for Drainage
Once you’ve confirmed the drainage failure points, set your driveway’s longitudinal and cross-slope to move runoff predictably to an approved collection or discharge location. Target a minimum 2% cross-slope (1/4 inch per foot) away from structures so sheet flow doesn’t reach the foundation.
For longitudinal driveway slope, keep grades typically between 1% and 10% to drain without creating traction or icing hazards; verify local limits and ADA progressions at walk interfaces.
Use drainage grading controls: maintain positive slope at the garage threshold, direct flow to a trench drain, swale, or curb inlet, and prevent discharge onto sidewalks or neighboring lots per municipal codes.
Confirm slopes with a laser level and record readings at 5–10 foot intervals.
Patch Low Spots to Stop Water Pooling
After you’ve set the overall slope, you’ll need to eliminate localized depressions that still trap runoff. You can identify and mark low spots by flooding the surface or using a straightedge and level.
Then, map any ponding deeper than about 1/8 in. Apply a driveway-rated patch compound in lifts and screed it flush to maintain continuous positive drainage per manufacturer specs and local code requirements.
Identify And Mark Depressions
Although a slight pitch can meet typical drainage targets (about 1–2% slope, or 1/8–1/4 in. per ft. away from structures), even small depressions interrupt flow and create ponding that accelerates freeze–thaw damage and surface raveling.
So you should locate and mark every low spot by checking grade with a 4–6 ft. straightedge** and level (or a laser level). Then outline the ponding footprint** with paint/chalk and note the maximum depth by measuring the gap under the straightedge to quantify how much patch material you’ll need.
Recheck after a rain to confirm active pooling zones. Flag changes at joints, utility cuts, and edges where your driveway material meets soil or pavers.
Keep markings aligned with landscape integration features (swales, beds, downspouts) so runoff paths stay code-compliant and away from foundations.
Record depths and areas for consistent QC.
Apply Patch And Level
Because ponding concentrates load and accelerates freeze–thaw cycling, you need to patch each marked depression to re-establish a continuous 1–2% drainage slope (about 1/8–1/4 in. per ft.) away from the foundation and toward the approved discharge point.
For asphalt, sawcut or mill loose edges, blow clean, then apply tack coat; place a polymer-modified cold patch or hot mix in lifts ≤1 in., compacting to 95% density with a plate compactor.
For concrete, rout cracks, use a bonding agent, and place a cementitious repair mortar; finish with a straightedge and verify slope with a 4‑ft level. Keep patch tops 1/16 in. proud for final compaction.
Re-cut joints at decorative borders and plan driveway sealing after cure.
Regrade Edges and Add Swales for Runoff
You’ll start by identifying edge low spots with a stringline/level and marking ponding areas so runoff routes away from structures and complies with local drainage requirements.
You’ll then shape shallow swales with continuous positive slope (typically 1–2% minimum) and adequate cross-section to convey the design flow without overtopping the driveway.
Finally, you’ll stabilize regraded edges with compacted base, erosion-control fabric, and vegetation or rock armor so the swale geometry holds through storm cycles.
Identify Low Spots
Where does water actually pause or reverse direction on your driveway after a 1/4–1/2 in. rain? Mark ponding that lasts over 60 minutes; that duration typically signals insufficient slope or clogged discharge.
Use a 10-ft straightedge and tape: measure the gap at midspan. Less than 1/4 in. fall over 10 ft (<0.2%) risks standing water; target identification against a 1–2% design slope (1/8–1/4 in. per ft) commonly required for hardscape drainage.
Check edges too: curb-like lips trap sheet flow.
Probe adjacent soils to estimate soil absorption; saturated subgrade indicates infiltration limits.
Note where vegetation barriers or mulch berms divert flow back onto pavement.
Photograph and map low points relative to buildings, keeping runoff away from foundations.
Shape Swales For Flow
After you’ve marked persistent ponding, regrade the driveway edges to create shallow swales that keep runoff moving to a legal discharge point.
Target a continuous 2% slope (1/4 in per ft) away from the slab or asphalt, and keep swales 6–12 in wide with 1–3 in of fall so flow doesn’t overtop onto pavement.
Use a stringline and level to verify grade every 4–6 ft, and avoid directing water to sidewalks, neighbors, or the street where local code prohibits it.
Tie the swale into an existing curb cut, approved inlet, or onsite landscape basin designed for water absorption.
Install garden edging as a guide to hold the swale line and prevent soil creep during shaping operations.
Stabilize Regraded Edges
Once the swale grade checks out at roughly 2% to your approved discharge point, lock the regraded edges in place so runoff doesn’t erode the channel and dump sediment back onto the driveway.
Install 4–6 oz/sq yd erosion-control blanket or turf reinforcement mat, pinning per manufacturer spacing, then topdress with 2–3 inches of amended loam and seed/sod for 70% cover within 30 days.
Where velocities exceed about 3 ft/s, armor with 3–6 inch riprap over nonwoven geotextile and add a 2-inch gravel filter strip at the pavement edge.
Keep slopes at 3H:1V or flatter for stability and mowing.
Match materials to landscaping aesthetics and driveway material choices so progressions stay tight, drainable, and code-compliant.
Choose a Trench vs Channel Drain (When to Use Each)
Although both systems intercept surface runoff, you’ll choose a trench drain when you need a high-capacity, linear inlet that spans the full flow path (such as across a sloped driveway or at a garage threshold).
And you’ll choose a channel drain when you need a grate-and-channel assembly sized for predictable sheet flow and connected to a storm line with code-compliant slope, outlet size, and load rating (e.g., NDS/Class A–D per ASTM/EN, as applicable).
Use trench drain advantages when peak inflow exceeds typical grate capacity or when you must capture concentrated rills; specify grate class to match vehicle loads.
Use channel drain installation when you can maintain 1% minimum fall (or per manufacturer) to the outlet and tie into an approved storm or drywell per local code.
Confirm invert elevations, cleanout access, and sediment management.
Install a Garage-Entry Channel Drain to Block Flooding
When runoff sheets toward your garage door, a properly sized channel drain at the entry intercepts flow at the threshold and routes it to an approved discharge point before water can overtop the slab edge.
Size the grate and body for your design storm and tributary area; you’ll typically target 1%–2% cross-slope to the inlet and confirm outlet capacity so the system doesn’t surcharge.
For Garage entry protection, set the drain flush with the driveway plane and keep the garage slab slightly higher to preserve positive drainage.
During Channel installation, bed the unit in concrete, align sections to maintain a continuous invert, and connect to a trapped, code-approved storm line or daylight per local requirements.
Use load-rated grates for vehicle traffic.
Maintain Driveway Drains: Debris, Ice, and Clogs
Even a correctly sized trench drain or catch basin fails if debris and ice reduce its open area and force water to bypass the inlet. Inspect grates weekly in leaf season and after every storm over 0.5 in. Remove sediment that cuts hydraulic capacity; a 25% blocked grate can reduce capture efficiency enough to re-create ponding at low slopes.
Jet or rod laterals when flow backs up, and confirm the outlet is clear to daylight or the storm sewer. Before freeze events, clear slush and apply chloride sparingly so you don’t accelerate concrete scaling or corrode metals.
Maintain positive grade to the inlet, reseal joints, and restore filter fabric where fines migrate. This supports Stormwater management and erosion control, and aligns with local maintenance ordinances.
Frequently Asked Questions
How Much Does Driveway Drainage Repair Typically Cost?
You’ll typically pay $500–$5,000 for driveway drainage repair. About 40% of homes have drainage issues. Code-compliant stormwater management and erosion control—via regrading, trench drains, or catch basins—drive costs based on soil and runoff volume.
Do I Need a Permit to Install a Driveway Trench or Channel Drain?
You’ll often need a permit for a driveway trench/channel drain, especially if it connects to storm sewers or alters grade. Check local Drainage permits and codes; DIY installation still requires inspections, setbacks, and discharge compliance.
Which Driveway Materials Handle Drainage Best: Asphalt, Concrete, or Pavers?
Permeable pavers handle drainage best; they can infiltrate up to 1,000 in/hr, far exceeding asphalt or concrete. You’ll still need proper drainage grading per local code. Dense pavements rely on slope and inlets.
Can Poor Driveway Drainage Affect My Home’s Foundation or Basement?
Yes, poor driveway drainage can affect your foundation and basement by driving hydrostatic pressure and moisture intrusion. You’ll accelerate soil erosion, undermine footings, and violate code-required landscape grading slopes that direct runoff away.
When Should I Hire a Professional Instead of Doing a DIY Drainage Fix?
Hire a professional when runoff persists after two storms, slope exceeds 5%, or you must cut concrete near utilities—then DIY safety and homeowner liability escalate. A licensed crew guarantees code-compliant grading, permits, and tested flow capacity.