
Nearly 30% of homeowner pressure-washer damage claims come from using the wrong PSI or nozzle on exterior walls. You’ll avoid costly gouges and leaks if you start by identifying the wall material, then inspect seams, caulk lines, and penetrations before you spray. Set pressure conservatively, hold the wand 18–24 inches out, and keep a steady, fan-pattern pass. But the biggest mistake usually happens before you even pull the trigger…
Key Takeaways
- Identify the wall material and test a small hidden area to confirm safe pressure, nozzle, and cleaner.
- Use the lowest effective PSI and a 25°–40° fan tip; keep 18–24 inches away and increase pressure gradually.
- Apply wall-safe detergent from bottom to top, let it dwell without drying, then rinse thoroughly to prevent streaks and residue.
- Spray at shallow downward angles with overlapping passes; avoid 0° tips and never force water behind siding, trim, or weep holes.
- Inspect for cracks and failed caulk before washing, then air-dry and recheck for trapped moisture or damage around trim and joints.
Identify the Wall Material Before Pressure Washing
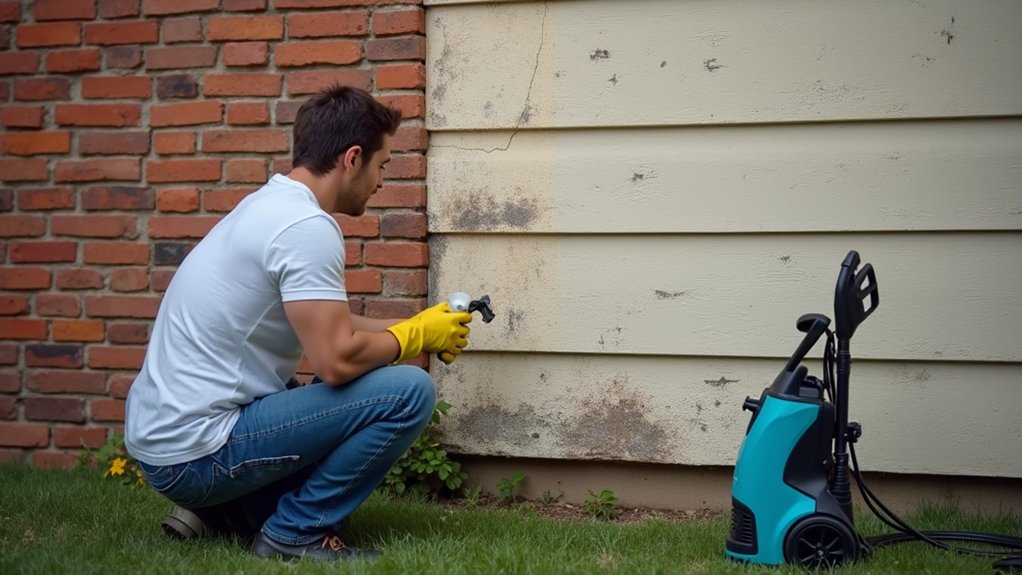
Before you touch the trigger, identify what your exterior wall is made of, because the right pressure, nozzle, and detergent depend on the substrate’s hardness and porosity. Confirm whether you’re cleaning vinyl, fiber-cement, brick, stucco, natural stone, painted wood, or bare wood by checking edges, fastener patterns, and cutouts.
Match Surface textures to spray risk: deep grooves, soft grains, and friable faces erode faster under impact. Calibrate pressure to Material durability—use low PSI and wider fan tips on wood and stucco; step up gradually for brick or dense stone.
Select detergents by chemistry: avoid strong alkalis on aluminum, acids on limestone, and solvents on fresh paint. Test a small, hidden area first, and adjust distance and angle.
Inspect Walls and Seal Gaps to Avoid Leaks
Before you wash, inspect the siding and mortar joints so you don’t force water behind the cladding. Identify any cracks, failed caulk lines, or open gaps around seams and penetrations, and mark them for repair.
Apply an exterior‑grade sealant per the manufacturer’s cure time and tooling guidance to create a continuous, watertight barrier.
Check Siding And Mortar
Even if you’re using a low-pressure tip, you should inspect the siding, mortar joints, and trim for cracks, loose boards, missing caulk, or crumbling grout because pressurized water will exploit any weak point and drive moisture behind the wall.
Work top to bottom and use a flashlight to check lap joints, corner boards, window surrounds, and hose bib penetrations.
Probe suspect wood with an awl; soft spots signal compromised siding durability and a higher risk of blowout.
On brick or block, tap joints lightly; hollow sounds indicate debonded areas needing mortar repair before washing.
Refasten loose boards, replace failed trim, and let patch materials cure fully.
If you skip this step, you’ll force water into cavities and trigger rot, efflorescence, and interior staining.
Find Cracks And Gaps
Once you’ve confirmed the cladding and joints are sound, switch to a leak-focused inspection and hunt for every crack and gap that could channel wash water behind the wall. Work top-down and use a bright flashlight at a low angle for Crack detection along trim, corners, penetrations, and changes in material.
Check around hose bibs, vents, light fixtures, window/door frames, and utility entries. Probe suspicious lines with a plastic pick; if it opens, it’s a pathway. Look for failed caulk edges, missing backer rod, and hairline mortar fractures. Mark every defect with painter’s tape so you don’t miss one later.
Keep ladders stable, wear eye protection, and avoid washing until Gap sealing prep is complete. Document locations with photos for follow-up repairs after drying and cleaning.
Apply Exterior-Grade Sealant
After you’ve flagged every crack and gap with tape, lock those pathways down with an exterior-grade sealant so pressure-wash water can’t get driven behind the cladding.
Start with Surface preparation: dry the area, brush out dust, and scrape failing caulk to sound edges. Wear gloves and eye protection, and ventilate if you’re using solvent-based products.
For Sealant application, cut the nozzle to match the joint width, then run a continuous bead without skipping. Tool the bead to press sealant into the gap and form a smooth, concave profile that sheds water.
Don’t seal weep holes or drainage paths. Let it cure per the label before washing, and keep the wand away from fresh joints to prevent blowouts. Recheck adhesion after curing.
Choose PSI and Distance for Exterior Walls
Before you pull the trigger, set your pressure washer’s PSI and your working distance to match the wall material, because excess pressure at close range can cut into siding, strip paint, and force water behind cladding.
Start low and step up: vinyl and painted wood typically tolerate 1,200–1,800 PSI, stucco and fiber cement 1,800–2,500 PSI, and brick 2,500–3,500 PSI if mortar is sound.
Maintain 18–24 inches from the surface, then adjust by backing away before increasing pressure.
Keep the wand moving and aim slightly downward to limit intrusion at laps and joints.
Confirm Pressure settings on a test patch, and lock in stable flow.
Coordinate nozzle selection with your target PSI to avoid unintended impact loads.
Pick the Right Nozzle (Fan Angle by Surface)
Next, you’ll control impact force by selecting the correct nozzle fan angle for the surface you’re cleaning. Use wider fans for softer materials to spread the spray and reduce etching.
Reserve narrower fans for tougher substrates only when needed. Match the nozzle to the wall material before you start, because the wrong angle can strip paint, gouge wood, or pit masonry fast.
Choose Fan Angle Wisely
Because the nozzle’s fan angle controls how concentrated the spray hits the wall, you need to match it to the surface to prevent etching, gouging, or driving water behind cladding. Start with a wider fan angle to reduce impact and keep the spray pattern stable.
Use 40° for routine rinsing and light soil; step down to 25° only when grime persists and you can keep the wand moving. Reserve 15° for tight, localized cleaning on durable areas, and never linger in one spot.
Avoid 0° tips on walls; the jet can cut coatings and open seams. Keep the nozzle perpendicular for even loading, and overlap passes by about one-third so you don’t stripe the finish.
Match Nozzle To Material
Although you can adjust distance and pressure, the safest control you’ve got is picking a nozzle that matches the wall material’s tolerance for impact and water intrusion.
Use a 40° fan on vinyl, painted wood, stucco, and older brick to spread force and reduce etching. Step to 25° only for dense, sound masonry with tight joints, and never linger on mortar lines.
Avoid 0° tips on walls; they’ll cut siding, scar concrete, and drive water behind cladding.
For fiber cement, keep to 40° and maintain steady passes with the wand angled downward.
Prioritize Pressure washer safety by locking the trigger when swapping tips and verifying the correct orifice size.
Build Nozzle maintenance into your routine: flush debris, inspect for wear, and replace distorted tips promptly.
Pre-Treat Exterior Walls With Wall-Safe Cleaner
Before you ever pull the trigger on the pressure washer, pre-treat the exterior wall with a wall-safe cleaner to loosen grime and reduce the pressure you’ll need later.
Start with surface preparation: cover outlets, light fixtures, and plants, then close windows and doors.
Choose cleaning agents labeled for your wall type (vinyl, brick, stucco, painted siding) and verify compatibility on a small, hidden spot.
Mix only to the manufacturer’s dilution; stronger isn’t safer and can etch finishes or bleach stains unevenly.
Apply from bottom to top to prevent streaking, keeping the wall evenly damp.
Let the cleaner dwell for the specified time, but don’t let it dry.
Re-wet as needed and scrub stubborn areas with a soft brush to avoid abrasion.
Pressure Wash Exterior Walls Safely, Then Rinse and Dry
Once the cleaner has loosened the grime, set up your pressure washer to remove it without gouging siding or forcing water behind the wall. Select a 25–40° nozzle, start at the lowest effective PSI, and keep the wand 12–24 inches away. Spray at a shallow downward angle, working top to bottom in overlapping passes.
Don’t linger on seams, vents, or cracked caulk; back off and reapply cleaner instead. Use controlled cleaning techniques around windows and flashing to prevent intrusion.
When finished, switch to low pressure and rinse until runoff is clear. Shut down, relieve hose pressure, and inspect for missed spots. Let walls air-dry, then check for moisture at trim.
Prioritize equipment maintenance: flush detergent lines, clean filters, and store dry.
Frequently Asked Questions
How Often Should Exterior Walls Be Pressure Washed?
You should pressure wash exterior walls annually, or every 6–12 months in humid or polluted areas. Prioritize surface preparation and equipment maintenance, inspect for cracks, test a small section, and adjust pressure and nozzle accordingly.
Should I Hire a Professional or Do It Myself?
Hire a professional if you’re unsure—DIY looks simple until the spray rebounds. DIY pitfalls include etching, leaks, and electrical risk. Professional benefits: calibrated PSI, detergents, PPE, methodical tests. You’ll save repairs, time.
What Safety Gear Is Recommended When Pressure Washing Walls?
Wear safety goggles, hearing protection, waterproof gloves, non-slip boots, and a respirator for mist. Add protective clothing with long sleeves. You’ll also prioritize equipment maintenance: inspect hoses, fittings, and nozzle locks before pressurizing.
Can Pressure Washing Remove Old Paint or Expose Lead Paint?
Yes—you can blast old paint off like peeling bark; you can also trigger Lead paint exposure. Treat it as Paint removal: test first, contain runoff, keep pressure low, use wet methods, and follow EPA RRP rules.
Are There Local Regulations or Water Restrictions for Pressure Washing?
Yes—you’re often subject to Local ordinances and drought Water conservation rules. You should check municipal codes for runoff, sewer discharge, and permitted hours. You must use containment, reclaim water, and avoid detergents into storm drains.