
You’ll modernise a cottage living room by tightening structure first: run a measured survey, confirm load paths, and sequence safety, compliance, then performance. Widen key doorways to 860–910 mm using concealed steel lintels, set crisp 90° returns, and align head heights to a single datum for cleaner sightlines. Open the fireplace safely with a sized lintel, updated hearth clearances, and a lined, insulated flue. Skim-coat ceilings, simplify built-ins, and add slim glazing or internal windows. Next, you’ll see how to refine flow and daylight without losing charm.
Key Takeaways
- Start with a measured survey and structural engineer’s note to confirm load paths before widening openings or trimming masonry.
- Open up key portals using concealed steel lintels and 90° returns to boost light flow while preserving cottage character.
- Improve circulation by widening main doorways to 860–910 mm and keeping clear routes 800–900 mm, avoiding pinch points.
- Increase daylight with slimline glazing, aligned head heights, internal windows, and rooflights over circulation zones to carry light deeper.
- Modernise subtly by aligning ceiling datums, skim-coating for uniformity, and simplifying built-ins with consistent reveals and concealed hardware.
Plan Structural Updates (Rules, Budget, Priorities)
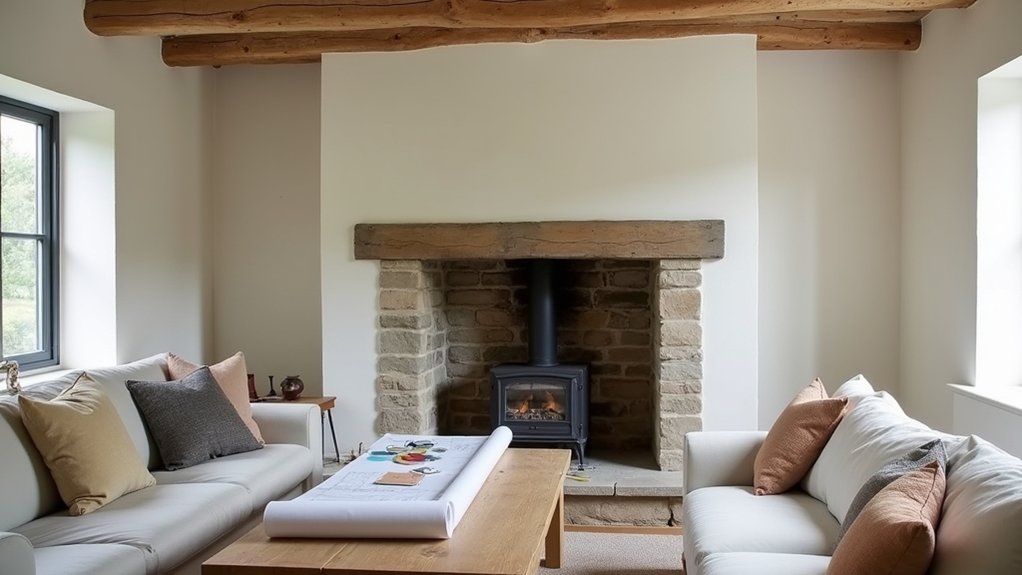
Before you change a single finish, map the structural moves that will modernise the room—openings, hearth modifications, built-ins, insulation, and lighting routes—and vet each one against local regulations and the cottage’s constraints.
Start with a measured survey: plumb, level, joist spans, chimney breast condition, and Foundation stability. If you’re altering openings or trimming masonry, commission a structural engineer’s note and specify Structural reinforcement (lintels, straps, sistered joists) before you price finishes.
Build a priority matrix: safety and compliance first, performance next (airtightness, thermal bridges, ventilation paths), then serviceability (access panels, cable zones).
Cost it in packages with contingencies for hidden rot or undersized footings.
Lock sequencing so trades don’t clash, and schedule inspections early.
Rework the Cottage Living Room Layout for Flow
Once you’ve locked the structural moves, rework the living-room layout by drawing the circulation first: map the natural entry points, mark a clear 800–900 mm primary route through the room, and keep pinch points around doors, the hearth, and window bays at 600 mm minimum.
Anchor the plan with the largest piece (typically a sofa) set perpendicular to the route so you don’t create a barrier.
Maintain 350–450 mm between seating and coffee table, and 900–1,100 mm in front of media or bookcases.
Use a rug to define the seating zone, keeping front legs on for cohesion.
Align secondary furniture to window sightlines for daylight reading.
Let furnishing styles stay low-profile and leggy, and use colour schemes to cue zones without extra partitions.
Widen Doorways to Modernise a Cottage Living Room
Although you might keep a cottage’s original openings, widening key doorways instantly improves circulation and sightlines, making the living room read as one continuous volume rather than a series of tight thresholds. Target the pinch points between lounge and hall or dining areas, and increase clear width to 860–910 mm where possible.
Maintain structural integrity by specifying an engineered lintel, verifying load paths, and matching jamb depth to existing wall thickness. You’ll also reduce visual clutter by aligning new casings with skirting profiles and setting consistent head heights across adjacent openings.
Use the expanded portals to refine furniture arrangement: float seating to preserve a 900 mm circulation route and avoid blocking corners. Reassess window treatments so drapery stacks don’t intrude into widened swing arcs.
Consider pocket doors to save clearance.
Open Up the Fireplace (Safely, Still Charming)
Before you open up the fireplace, you’ll check the jambs, breast, and existing lintel line for load paths, cracking, and clear span. Then specify a correctly sized steel or concrete lintel if the opening changes.
You’ll upgrade the hearth to current projection and thickness requirements, setting finished floor levels so it reads as intentional joinery rather than an afterthought.
You’ll also inspect and line the flue as needed, confirm ventilation and draw, and keep the opening proportions tight enough to preserve that cottage scale.
Assess Structural And Lintel
If you’re planning to open up a cottage fireplace, start by confirming what’s actually holding the chimney breast up and whether the existing lintel can take the load. Expose the masonry carefully, then identify the bearing points left and right, checking for stepped cracks, sagging brickwork, or past patching that compromises structural integrity.
Measure the opening width and the depth of sound masonry available for end bearing. If the lintel is timber, corroded steel, or undersized concrete, plan lintel replacement before you remove any infill.
Specify a lintel sized to span plus bearings, and compatible with existing wall thickness. Prop with acrow supports and strongboys while you work, keeping load paths continuous and settlement controlled.
Upgrade Hearth And Flue
Where do you gain the biggest safety and performance uplift when you reopen a cottage fireplace? You get it at the hearth plane and the flue path.
First, re-set the hearth to current clearances: non-combustible, level, and projecting far enough to manage ember fall and furniture spacing. Size the opening so circulation routes don’t pinch, and keep the fire’s radiant zone off timber skirtings.
Then line the flue with the right diameter for your appliance, seal the throat, and add a register plate to stop room air dumping up the stack.
Specify Fireplace insulation around the liner where it passes cold voids to stabilise draft and reduce condensation.
Plan chimney maintenance access: sweep hatch, cowl, and inspection points for tar, cracks, and nesting.
Clean Up Ceiling Lines Without Losing Character
Although cottage ceilings often come with awkward shifts—exposed beams, uneven plaster, picture rails, or piecemeal coving—you can sharpen the ceiling line by choosing one clear datum and detailing everything to it. Snap a level line around the room at the height that clears door heads and beam soffits, then align picture rail, coving, and any decorative moldings to that line.
Where ceiling textures fight the read, skim-coat to a uniform plane or confine texture to a single field between trim breaks. If beams stay, square their edges with discreet plaster returns and consistent shadow gaps, not filler. Terminate rails cleanly into corners with mitered returns, and standardize cornice projection so the perimeter reads continuous.
Finally, unify paint sheen and color across ceiling and trim to reduce visual stepping.
Simplify Built-Ins for a Modern Cottage Look
You’ll modernise cottage built-ins by specifying streamlined trim and low-relief profiles that reduce visual weight and keep sightlines clean.
Open up shelving by increasing clear spans, aligning shelf datum lines across the run, and limiting face frames so the unit reads as one plane.
Conceal pulls, hinges, and AV cabling with touch-latch doors, recessed finger pulls, and integrated chases or grommets to maintain an uninterrupted elevation.
Streamline Trim And Profiles
How do you keep cottage character while tightening the visual lines? Start by auditing every edge condition: baseboard, casing, crown, and any returns at built-ins.
Reduce decorative moldings to one primary detail per plane, then repeat it. Profile consistency matters more than ornament; align thicknesses so casings die cleanly into baseboards without stacked steps.
Standardize reveals—aim for a crisp 1/8-inch shadow line—so transitions read intentional. Square up corner blocks, remove fussy backbands, and choose a flatter, wider casing to visually calm openings.
Where trim meets cabinetry, keep flush faces and match stile widths to adjacent casing to prevent rhythm breaks.
Finally, confirm head heights and trim alignments across the room before you paint.
Open Up Shelving Lines
Before you change finishes or furniture, rework your built-ins so the shelving reads as one clean, continuous datum instead of a cluster of boxed niches. Set a single shelf height that aligns with window heads or door casings, then carry it across alcoves and returns to calm the elevation.
Reduce side panels and face frames to slimmer stiles, and keep verticals on a consistent module so openings feel intentional. Swap deep, stepped cubbies for fewer, wider bays that accommodate books, baskets, and media without visual fragmentation.
Use Decorative shelving sparingly: reserve one bay for curated objects, and keep the rest disciplined. Improve storage solutions by shifting bulkier items to lower, full-depth compartments and leaving upper runs lighter and open.
Conceal Hardware And Cables
Once the shelving reads as a single, calm line, strip away the remaining visual noise by hiding hardware and managing cables inside the built-ins. Start with hardware minimization: switch to push-latch doors, finger pulls, or edge pulls, and align reveals so handles don’t interrupt the grid. Specify soft-close hinges and conceal them within the carcass for clean sightlines.
For Cable concealment, route power and data through grommeted pass-throughs at shelf backs, then run vertical chases behind a removable panel. Add a recessed power strip in a ventilated equipment bay, and keep transformers off the floor with a mounted rail.
Use Velcro ties and labeled channels so you can service devices without re-tangling cords. Keep clearances for airflow and access.
Add Daylight With Glazing, Openings, and Sightlines
Although cottages often have small apertures and deep wall reveals, you can modernise the living room by increasing daylight at the perimeter and letting it travel through the plan.
Start with Window design: widen existing openings within structural limits, specify slimline frames, and align head heights to form a continuous datum that boosts Natural light. Use clear low-iron glazing where privacy allows, and add a high-level rooflight over circulation zones to pull light deeper.
Then improve sightlines. Replace solid doors with glazed screens, or introduce an internal window between living room and stair hall. Keep mullion spacing consistent, and detail flush thresholds so reflections don’t fragment.
If you open a wall, use a concealed steel lintel and set returns at 90° to reduce shadowing.
Frequently Asked Questions
Will Modern Structural Tweaks Reduce the Cottage’s Resale Value?
Usually, they won’t—70% of buyers pay more for move-in-ready homes. You’ll preserve resale if you retain historic charm and protect architectural details, while specifying reversible framing, concealed services, aligned openings, and code-compliant load paths.
How Can I Soundproof a Cottage Living Room Without Major Renovations?
You can soundproof a cottage living room by sealing gaps with acoustic caulk, adding rugs and heavy curtains, and layering dense underlay. Use decorative wall panels, bookcases, and insulation batts as soundproofing options.
What Insulation Upgrades Work Best When Walls Must Remain Breathable?
Like Penelope weaving, you’ll layer insulation materials that still exhale: wood-fibre boards, hemp, cork, or lime-based plaster with mineral wool. Address breathability concerns using vapour-open membranes, airtight tapes, and thermal-break detailing.
How Do I Blend Smart-Home Tech Into a Cottage Living Room Discreetly?
You’ll blend smart-home tech discreetly by prioritizing Hidden tech integration: recess hubs in joinery, route low-voltage cabling in skirting voids, and specify flush sensors. Use Aesthetic concealment with fabric speaker grilles, matching faceplates, and concealed power.
Which Paints and Finishes Suit Modern Cottage Style Without Looking Stark?
Like linen in morning light, you’ll choose warm off-whites, greige, or muted sage in matte/eggshell; pair satin trims. Balance Vintage wallpaper with soft clay accents. Keep Rustic woodwork in low-sheen varnish for measured contrast.